Sekiro: Shadows Die Twice has a habit of making experienced action-game players feel strangely incompetent. The problem is rarely slow reactions. More often, the game is punishing habits learned elsewhere.
Dodging everything, waiting for enormous openings and chipping away at health may work in other FromSoftware games. In Sekiro, those tactics can turn a two-minute sword fight into a prolonged administrative error.
The key is to understand what the game wants from you. Attack with intent, deflect rather than retreat, recognise perilous attacks and use every underhanded shinobi trick available. Honour is important to samurai. Wolf is not a samurai.
This beginner’s guide explains the essential combat mechanics, the best early skills, useful prosthetic tools and a sensible progression route through the opening hours.
Sekiro Beginner Tips at a Glance
If you remember nothing else, remember these principles:
- Deflect attacks instead of repeatedly dodging away.
- Attack until the enemy deflects you, then prepare to defend.
- Buy the Mikiri Counter as soon as possible.
- Hold block when you need your posture to recover.
- Reduce an enemy’s vitality if their posture recovers too quickly.
- Use stealth to remove one health bar from eligible mini-bosses.
- Spend skill points before difficult fights.
- Convert loose sen into coin purses whenever possible.
- Use prosthetic tools to exploit specific weaknesses.
- Treat Dragonrot as a manageable system, not an emergency.
- Explore another route if one boss has brought your progress to a halt.
- Do not press the resurrection button automatically.
That last lesson takes longer to learn than it should. The large red button appears and the brain immediately says, “Yes, more suffering please.”
How Sekiro’s Combat Actually Works
Sekiro is built around posture rather than conventional health damage. Every enemy has a vitality bar and a posture bar, but breaking posture is usually the quickest route to victory.
Attacks increase an opponent’s posture. Deflections increase it much more rapidly. Once the posture meter fills, the enemy becomes vulnerable to a deathblow.
Vitality still matters because injured enemies recover posture more slowly. Against an opponent who quickly shakes off your pressure, deal some health damage first and then begin forcing the posture break.
| Combat element | What it does | Beginner priority |
|---|---|---|
| Vitality | Represents physical health | Reduce it when posture recovery is too fast |
| Posture | Determines vulnerability to a deathblow | Apply constant pressure to fill the meter |
| Guard | Blocks ordinary damage but increases your posture | Useful, but should not replace deflection |
| Deflection | Blocks at the correct moment and damages enemy posture | The foundation of Sekiro combat |
| Deathblow | Removes one health bar | Use immediately when the red marker appears |
| Perilous attack | Special attack announced by a red warning symbol | Identify the animation before choosing a response |
Your own posture cannot be broken by an accurately timed deflection, even when the posture bar is almost full. This is one of the game’s most important rules. A flashing posture bar looks alarming, but correct technique can keep you standing.
Learn the Rhythm of Attack and Deflection
The safest general rhythm is to attack until the enemy produces a stronger deflection, then prepare for their counterattack.
A normal enemy block creates a relatively muted effect. An enemy deflection produces a brighter spark and sharper metallic sound. That is the game telling you that your turn is probably over.
A typical exchange looks like this:
- Attack while the enemy is guarding.
- Watch and listen for the enemy’s deflection.
- Stop attacking.
- Deflect the incoming counterattack.
- Resume your pressure.
This creates the back-and-forth rhythm that defines Sekiro. Once it clicks, battles stop feeling like panicked survival and begin to resemble actual sword exchanges. You are still likely to die, naturally, but at least the death has choreography.
Avoid hammering the attack button. Queued inputs can trap Wolf in another swing when you need to defend. Deliberate inputs make it far easier to react.
Deflect More and Dodge Less
Dodging has its place, particularly against grabs and certain large attacks, but it is not your default defensive answer.
Repeatedly retreating gives enemies time to recover posture. It also prevents you from learning their attack rhythm. Against skilled swordsmen, standing your ground and deflecting is usually safer than trying to roll around them as though Sekiro has suddenly become Dark Souls.
For early practice:
- Watch the enemy’s weapon rather than the red perilous symbol.
- Tap block shortly before the strike lands.
- Listen for the brighter, harder sound of a successful deflection.
- Practise consecutive deflections against multi-hit combinations.
- Avoid holding the block button and rapidly tapping it without thought.
Rapidly tapping block can occasionally rescue a messy exchange, but the game gradually reduces the effective deflection window when the button is repeatedly pressed. It is a useful emergency habit and a poor long-term technique.
Hanbei the Undying, found beside the Dilapidated Temple, offers risk-free combat training. Complete his basic lessons and return when advanced exercises become available. He is patient, immortal and apparently has no better plans.
How to Counter Perilous Attacks
The red warning symbol tells you that an unblockable technique is coming. It does not tell you which technique. You must read the opponent’s body and weapon.
| Perilous attack | Visual clue | Correct response |
|---|---|---|
| Thrust | Weapon is drawn back and aimed towards Wolf | Use Mikiri Counter or deflect |
| Sweep | Weapon moves low and across the body | Jump over it, then jump on the enemy |
| Grab | Enemy reaches, lunges or opens their arms | Dodge or sprint out of range |
| Lightning | Electrical energy gathers around an airborne enemy | Jump, receive the lightning and return it before landing |
Thrusts can technically be deflected, but Mikiri Counter is safer and inflicts excellent posture damage. Sweeps should be jumped, followed by another jump input while directly above the enemy to kick off their head.
Do not react only to the warning symbol. The same warning accompanies several completely different attacks. Watch the hips, shoulders and weapon position. Sekiro asks for observation, which feels rather unreasonable when a seven-foot warrior is waving a spear at your face.
Unlock Mikiri Counter First
Mikiri Counter should be the first major skill purchased from the Shinobi Arts tree. It transforms enemy thrusts from terrifying attacks into opportunities for substantial posture damage.
To perform it:
- Wait for the enemy to commit to a thrust.
- Press the dodge button without moving sideways, or move directly towards the attack.
- Wolf will step onto the weapon if the timing and direction are correct.
- Follow with an attack when the enemy is staggered.
New players often press the button too early. Wait until the thrust begins travelling towards Wolf rather than reacting immediately to the red symbol.
Practise against spear-wielding soldiers and Hanbei. The Shinobi Hunter at Hirata Estate serves as the early examination. He is not a gentle examiner.
The Best Early Skills to Unlock
Skill points are permanently banked once earned. Progress towards the next point can be lost on death, but completed points cannot.
This makes it sensible to earn the final portion of a skill point before entering an unfamiliar boss arena.
| Skill | Skill tree | Why it matters |
|---|---|---|
| Mikiri Counter | Shinobi Arts | Punishes thrust attacks and remains useful throughout the game |
| Suppress Presence | Shinobi Arts | Makes stealth approaches more forgiving |
| Breath of Life: Light | Shinobi Arts | Restores vitality after performing a deathblow |
| Chasing Slice | Prosthetic Arts | Closes distance after using the Loaded Shuriken |
| Grappling Hook Attack | Prosthetic Arts | Creates attacks from grapple opportunities |
| Mid-air Prosthetic Tool | Shinobi Arts | Makes several tools faster and more flexible |
| Ascending Carp | Ashina Arts | Increases posture damage after successful deflections |
| Descending Carp | Ashina Arts | Improves posture damage following a deflection |
| Ichimonji | Ashina Arts | Deals posture damage while recovering Wolf’s posture |
Whirlwind Slash is a useful early combat art, especially against groups, but do not become dependent on it. Its long animation can leave Wolf exposed against enemies who refuse to be politely interrupted.
The Ashina Arts tree becomes available after completing the Tengu of Ashina’s early request near the battlefield beyond Gyoubu. Its passive skills are exceptionally useful for sword combat.
Best Prosthetic Tools for Beginners
Prosthetic tools are not universal solutions. Each fills a tactical role, and several enemies are designed around obvious weaknesses.
| Prosthetic tool | Early location | Best use |
|---|---|---|
| Loaded Shuriken | Ashina Outskirts, Gate Path building | Airborne enemies, animals and interrupting movement |
| Flame Vent | Hirata Estate, Estate Path | Enemies vulnerable to fire, especially the Chained Ogre |
| Loaded Axe | Hirata Estate, Estate Path | Breaking wooden shields and dealing heavy posture damage |
| Shinobi Firecracker | Purchased from an early memorial mob merchant | Frightening beasts and creating short openings |
| Loaded Spear | Ashina Reservoir, after obtaining the Gatehouse Key | Pulling armour from certain enemies and controlling range |
| Mist Raven | Hidden in Hirata Estate | Escaping pressure and repositioning through attacks |
Spirit Emblems are consumed when tools are used, so random experimentation can become expensive. Test deliberately and learn what each tool interrupts.
The Loaded Shuriken is more useful than its modest damage suggests. It can knock airborne enemies down, punish foes who leap away and support Chasing Slice as a fast gap-closing combination.
The Flame Vent works particularly well when paired with Oil. Burning temporarily prevents posture recovery, which can turn a stubborn enemy into a much more cooperative one.
Recommended Early-Game Progression Route
Sekiro opens into several routes after the first stretch of Ashina Outskirts. You are not required to clear every branch immediately.
A practical beginner route is:
| Stage | Objective | Important rewards |
|---|---|---|
| Dilapidated Temple | Train with Hanbei and speak to the Sculptor | Combat practice and Shinobi Arts |
| Ashina Outskirts | Find the Loaded Shuriken and defeat early mini-bosses | Gourd Seeds and Prayer Beads |
| Hirata Estate, first visit | Collect the Flame Vent and Loaded Axe | Prosthetic tools and upgrade materials |
| Return to Ashina Outskirts | Use fire against the Chained Ogre | Access to later Outskirts areas |
| Outskirts battlefield | Defeat Gyoubu Masataka Oniwa | Memory for Attack Power |
| Ashina Castle gate area | Complete the Tengu’s request | Ashina Arts Esoteric Text |
| Hirata Estate, deeper route | Face the Shinobi Hunter and continue towards Lady Butterfly | Prayer Beads and boss experience |
| Ashina Castle | Explore rooftops and interior routes | Story progression and valuable upgrades |
You may fight Lady Butterfly before or after Gyoubu. Gyoubu is generally the more forgiving first major boss. Lady Butterfly is quicker and demands better pressure, shuriken use and aerial punishment.
If Lady Butterfly feels overwhelming, leave Hirata Estate and continue through Ashina Outskirts. Returning with more vitality, healing charges and experience is strategy, not cowardice. Wolf owns a grappling hook and regularly stabs people from bushes. His moral position is already flexible.
Explore Before Grinding
Traditional level grinding has limited value in Sekiro. Skills help, but most meaningful character improvements come from exploration and boss victories.
Look for:
- Prayer Beads from mini-bosses and hidden locations
- Gourd Seeds for additional healing uses
- Prosthetic Tools
- Esoteric Texts that unlock skill trees
- Sculptor’s Idols that open shortcuts
- Merchants selling information, materials and coin purses
- Memories awarded by major bosses
Four Prayer Beads create a Prayer Necklace, increasing maximum vitality and posture. Boss Memories increase Attack Power when confronted at a Sculptor’s Idol.
If a boss is causing trouble, searching for missed upgrades is often more useful than repeatedly farming ordinary enemies.
Use Stealth to Control Encounters
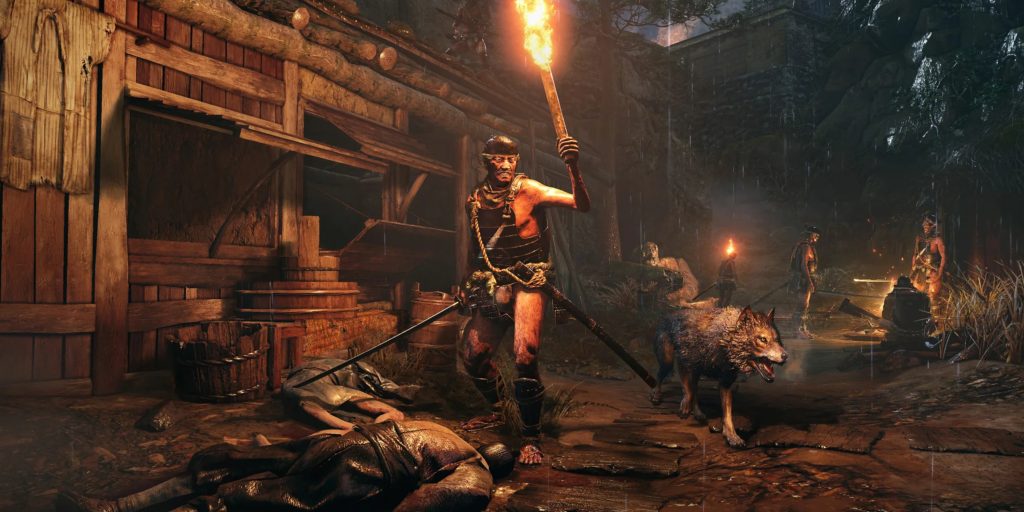
Stealth is not an optional side system. It is a central part of Wolf’s toolset.
Before entering combat, survey the area from rooftops, ledges or tall grass. Mark ranged enemies, identify escape routes and decide who should disappear first.
Useful habits include:
- Eliminate archers and riflemen before confronting melee enemies.
- Use ceramic shards to draw individual guards towards cover.
- Hang from ledges and use wall-hug deathblows.
- Break line of sight if too many enemies become alert.
- Approach mini-bosses from behind when a stealth deathblow is possible.
- Use Bloodsmoke Ninjutsu later in the game to continue a stealth chain.
Many mini-bosses possess two deathblow markers. A stealth attack can remove the first, leaving only one phase to fight openly.
Some encounters reset if you retreat far enough. Clear the supporting enemies, escape until the mini-boss loses interest, then return for the opening deathblow. It is hardly heroic, but heroism has a notoriously poor survival rate.
How Posture Recovery Works
Wolf recovers posture by avoiding attacks, but holding guard accelerates the recovery. This feels backwards at first, particularly to players trained to lower their shield whenever stamina needs to return.
Your posture also recovers faster when you have more vitality. At low health, it remains strained for longer.
Enemy posture follows a similar principle:
- High-vitality enemies recover posture quickly.
- Damaged enemies retain posture damage for longer.
- Burning temporarily stops posture recovery.
- Continuous attacks force enemies to guard.
- Deflections punish their attempt to counterattack.
Against ordinary soldiers, posture can often be broken almost immediately. Against bosses, begin by shaving away some vitality before committing to sustained pressure.
Do not chase a posture break if your own position has collapsed. Back away, hold guard and reset the exchange.
Understanding Death, Resurrection and Dragonrot
When Wolf dies, he usually loses half of his loose sen and half of the experience accumulated towards the next skill point. Lost resources cannot be recovered from the place of death.
Unseen Aid occasionally prevents this penalty. Its chance decreases as Dragonrot spreads.
Resurrection lets Wolf return during an encounter, but using it thoughtlessly can create another immediate death and increase the chance of Dragonrot after the true death that follows.
Before resurrecting, consider:
- Is the boss close to a posture break or deathblow?
- Can Wolf safely heal after standing?
- Is there an escape route?
- Would returning to the last idol be more sensible?
- Are valuable sen or experience currently at risk?
Dragonrot affects certain non-player characters and can temporarily interrupt their quest progression. It does not permanently kill them, lock you out of the main story or make the game unwinnable.
Dragon’s Blood Droplets can cure active cases after Emma helps unlock Dragonrot Restoration. Cure it when you want to continue an affected questline. There is little benefit in using a droplet after every unfortunate evening with a spear.
Protect Your Sen and Experience
Death can become expensive, but the losses are manageable with a little planning.
Before a major fight:
- Spend sen on useful items and prosthetic upgrades.
- Purchase coin purses from merchants.
- Earn the remainder of a nearly complete skill point.
- Restock Spirit Emblems.
- Check whether another Prayer Necklace can be completed.
- Equip the prosthetic tools and consumables needed for the encounter.
Coin purses cost slightly more than the sen stored inside them, but they remain in the inventory after death. The small surcharge is effectively shinobi banking.
Completed skill points are safe. Only progress towards the next point is at risk, so farming a short distance before a boss can prevent unnecessary losses.
Healing and Consumables Worth Using
The Healing Gourd is your main recovery item and refills whenever you rest. Give Gourd Seeds to Emma to increase the number of uses.
Several other items are genuinely useful:
| Item | Practical use |
|---|---|
| Pellets | Gradual healing when a full Gourd use would be wasteful |
| Ako’s Sugar | Increases vitality and posture damage |
| Gokan’s Sugar | Reduces posture damage received |
| Ungo’s Sugar | Reduces vitality damage received |
| Oil | Makes enemies easier to burn with the Flame Vent |
| Fistful of Ash | Interrupts or briefly stuns many human enemies |
| Ceramic Shard | Lures isolated enemies during stealth |
| Antidote Powder | Treats poison |
| Dousing Powder | Reduces Burn build-up and improves resistance |
| Pacifying Agent | Reduces Terror build-up and improves resistance |
| Divine Confetti | Improves damage against apparition-type enemies |
Do not hoard every consumable for an imaginary future crisis. That crisis will eventually arrive, but by then you will have forgotten the items exist.
Rare consumables deserve discretion. Ordinary Pellets, Ash, Oil and Ceramic Shards are there to be used.
Early Boss and Mini-Boss Advice
The opening areas teach mechanics through increasingly unpleasant practical demonstrations.
General Naomori Kawarada
Use him to practise deflection and sweep counters. Approach from behind to remove his first health bar with a stealth deathblow.
Stay close enough to interrupt his posture-recovery move. Allowing him to reset turns a brief fight into unpaid overtime.
Chained Ogre
Use Oil followed by the Flame Vent. Fire frightens him and creates an attack window.
His grabs are extremely dangerous and can track more aggressively than expected. Dodge or sprint away rather than attempting to block. Attack only a few times before preparing to move.
Shinobi Hunter Enshin of Misen
Clear the surrounding guards before fighting him. Unlock Mikiri Counter and use his thrust attacks to inflict heavy posture damage.
Do not panic at the length of his spear. The Mikiri timing occurs as the thrust travels towards Wolf.
Gyoubu Masataka Oniwa
Deflect his spear attacks rather than chasing the horse around the arena. Use the Firecracker to frighten the mount, but allow time between uses because repeated attempts can become ineffective.
Purchase Grappling Hook Attack and use the green grapple prompt to close distance safely.
Lady Butterfly
Maintain aggression and deflect her counterattacks. Throw a shuriken when she is airborne to knock her down.
Snap Seeds can dispel her illusions, but they are limited early on. You can also run around the arena until the illusions vanish and avoid the projectiles that follow.
Common Beginner Mistakes
Playing Sekiro Like Dark Souls
Dodging around every attack gives enemies space to recover. Deflection is usually the stronger response.
Fighting Entire Groups at Once
Wolf is fast, but being surrounded remains awful. Use stealth, vertical movement and retreat routes to separate enemies.
Ignoring the Mikiri Counter
Thrust attacks become common and increasingly dangerous. Buy Mikiri early and practise it.
Attacking Through an Enemy Deflection
When an opponent strongly deflects your strike, expect an immediate counterattack. Continuing to swing often means being hit during your next animation.
Hoarding Every Item
Tools and consumables exist to create advantages. The game does not award a special ending for finishing with 173 unused Pellets.
Spamming Prosthetic Tools
Spirit Emblems are limited, and most tools work best against particular enemies. Use them to solve problems rather than replace swordplay.
Healing at the Wrong Distance
Bosses frequently have attacks designed to punish healing. Create distance, use terrain or wait until the enemy finishes a long animation.
Focusing Only on Vitality Damage
Many enemies are easier to defeat through posture. Damage vitality when necessary, then maintain pressure and pursue the deathblow.
What to Do When You Are Stuck
Repeated attempts are useful only when you are learning something.
After each defeat, ask:
- Which attack caused the most trouble?
- Was it a thrust, sweep or grab?
- Did you lose because of timing or poor positioning?
- Were supporting enemies left alive?
- Did the opponent recover posture whenever you retreated?
- Is there a prosthetic weakness you have not tested?
- Have you missed Prayer Beads or Gourd Seeds?
- Could another route be explored first?
Try spending one attempt purely observing the boss. Block, move and identify the sequences without worrying about winning. Removing the pressure to attack often reveals how orderly the moveset actually is.
Once the pattern becomes familiar, begin inserting deflections, counters and short attack windows. Bosses that initially appear chaotic are usually very consistent. They are murderous, certainly, but punctual.
Advanced Practice Without Losing Resources
After defeating a major boss, Reflection of Strength allows you to fight that boss again through a Sculptor’s Idol. Attack Power is adjusted for the rematch, and consumed quick items and Spirit Emblems are restored afterwards.
This makes Reflections useful for practising:
- Deflection timing
- Perilous attack recognition
- Prosthetic combinations
- Combat Arts
- Boss phases you survived through luck the first time
Gauntlets of Strength are later boss-rush challenges and are not intended as beginner content. They become available after meeting relevant completion requirements.
Reflections are the better training ground. They let you study a defeated boss without risking sen, experience or consumables.
Final Advice for New Sekiro Players
The moment Sekiro begins to make sense is usually the moment you stop treating every enemy attack as something to escape.
Stand close. Attack deliberately. Listen for the deflection. Answer the counterattack. Learn whether the red warning means thrust, sweep or grab. The game remains difficult, but it becomes readable.
That distinction matters. Difficulty feels arbitrary when you do not understand the rules. Once the rules become clear, even a brutal fight starts to feel fair enough to attempt again.
There will still be camera problems, suspiciously enthusiastic grab hitboxes and a few enemies who seem to have studied advanced nonsense. Yet Sekiro offers one of the most precise combat systems FromSoftware has created. The early hours are less about building a powerful character than rebuilding your own instincts.
Hesitation may be defeat, but blind confidence is usually defeat as well.
Sekiro Beginner’s Guide FAQ
What skill should I unlock first in Sekiro?
Unlock Mikiri Counter first. It turns thrust attacks into opportunities for major posture damage and remains essential throughout the game.
Should beginners fight Lady Butterfly or Gyoubu first?
Gyoubu is generally the more approachable first major boss. You can explore Hirata Estate early for prosthetic tools, then return to fight Lady Butterfly after gaining more vitality and healing charges.
Should I block, deflect or dodge?
Deflect most weapon attacks. Block when learning a sequence or recovering posture. Dodge and sprint away from grabs or attacks that are better avoided than confronted.
Does dying repeatedly ruin a Sekiro playthrough?
No. Death may spread Dragonrot and costs sen plus incomplete experience progress, but it cannot make the main story unwinnable. Dragonrot can also be treated.
Can you level up before fighting a difficult boss?
You can unlock skills and find Prayer Beads, Gourd Seeds and prosthetic upgrades. Attack Power primarily increases through boss Memories, so conventional grinding has limited value.
Is Sekiro harder than Dark Souls?
That depends heavily on the player. Sekiro offers fewer build options but gives you a more precise defensive system. Players who learn deflection often find the game becomes much more manageable after its early difficulty spike.