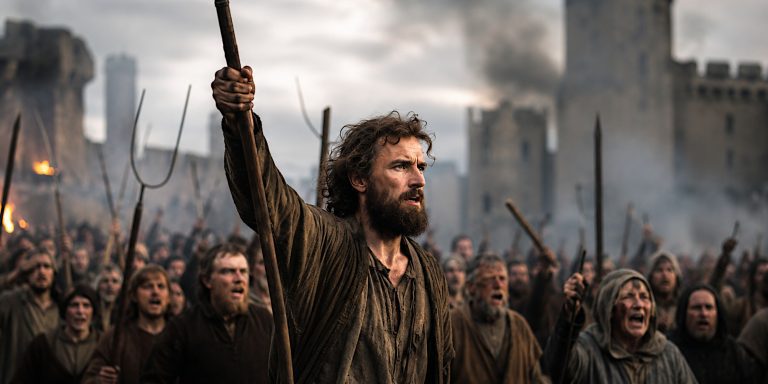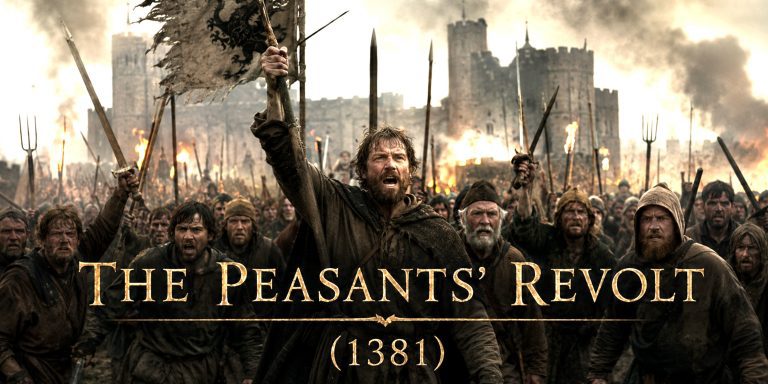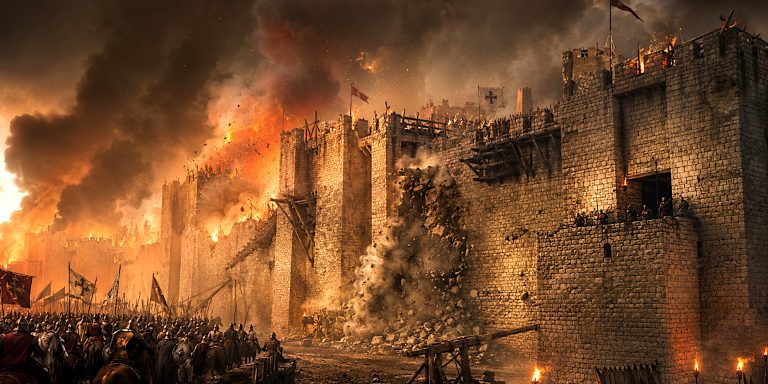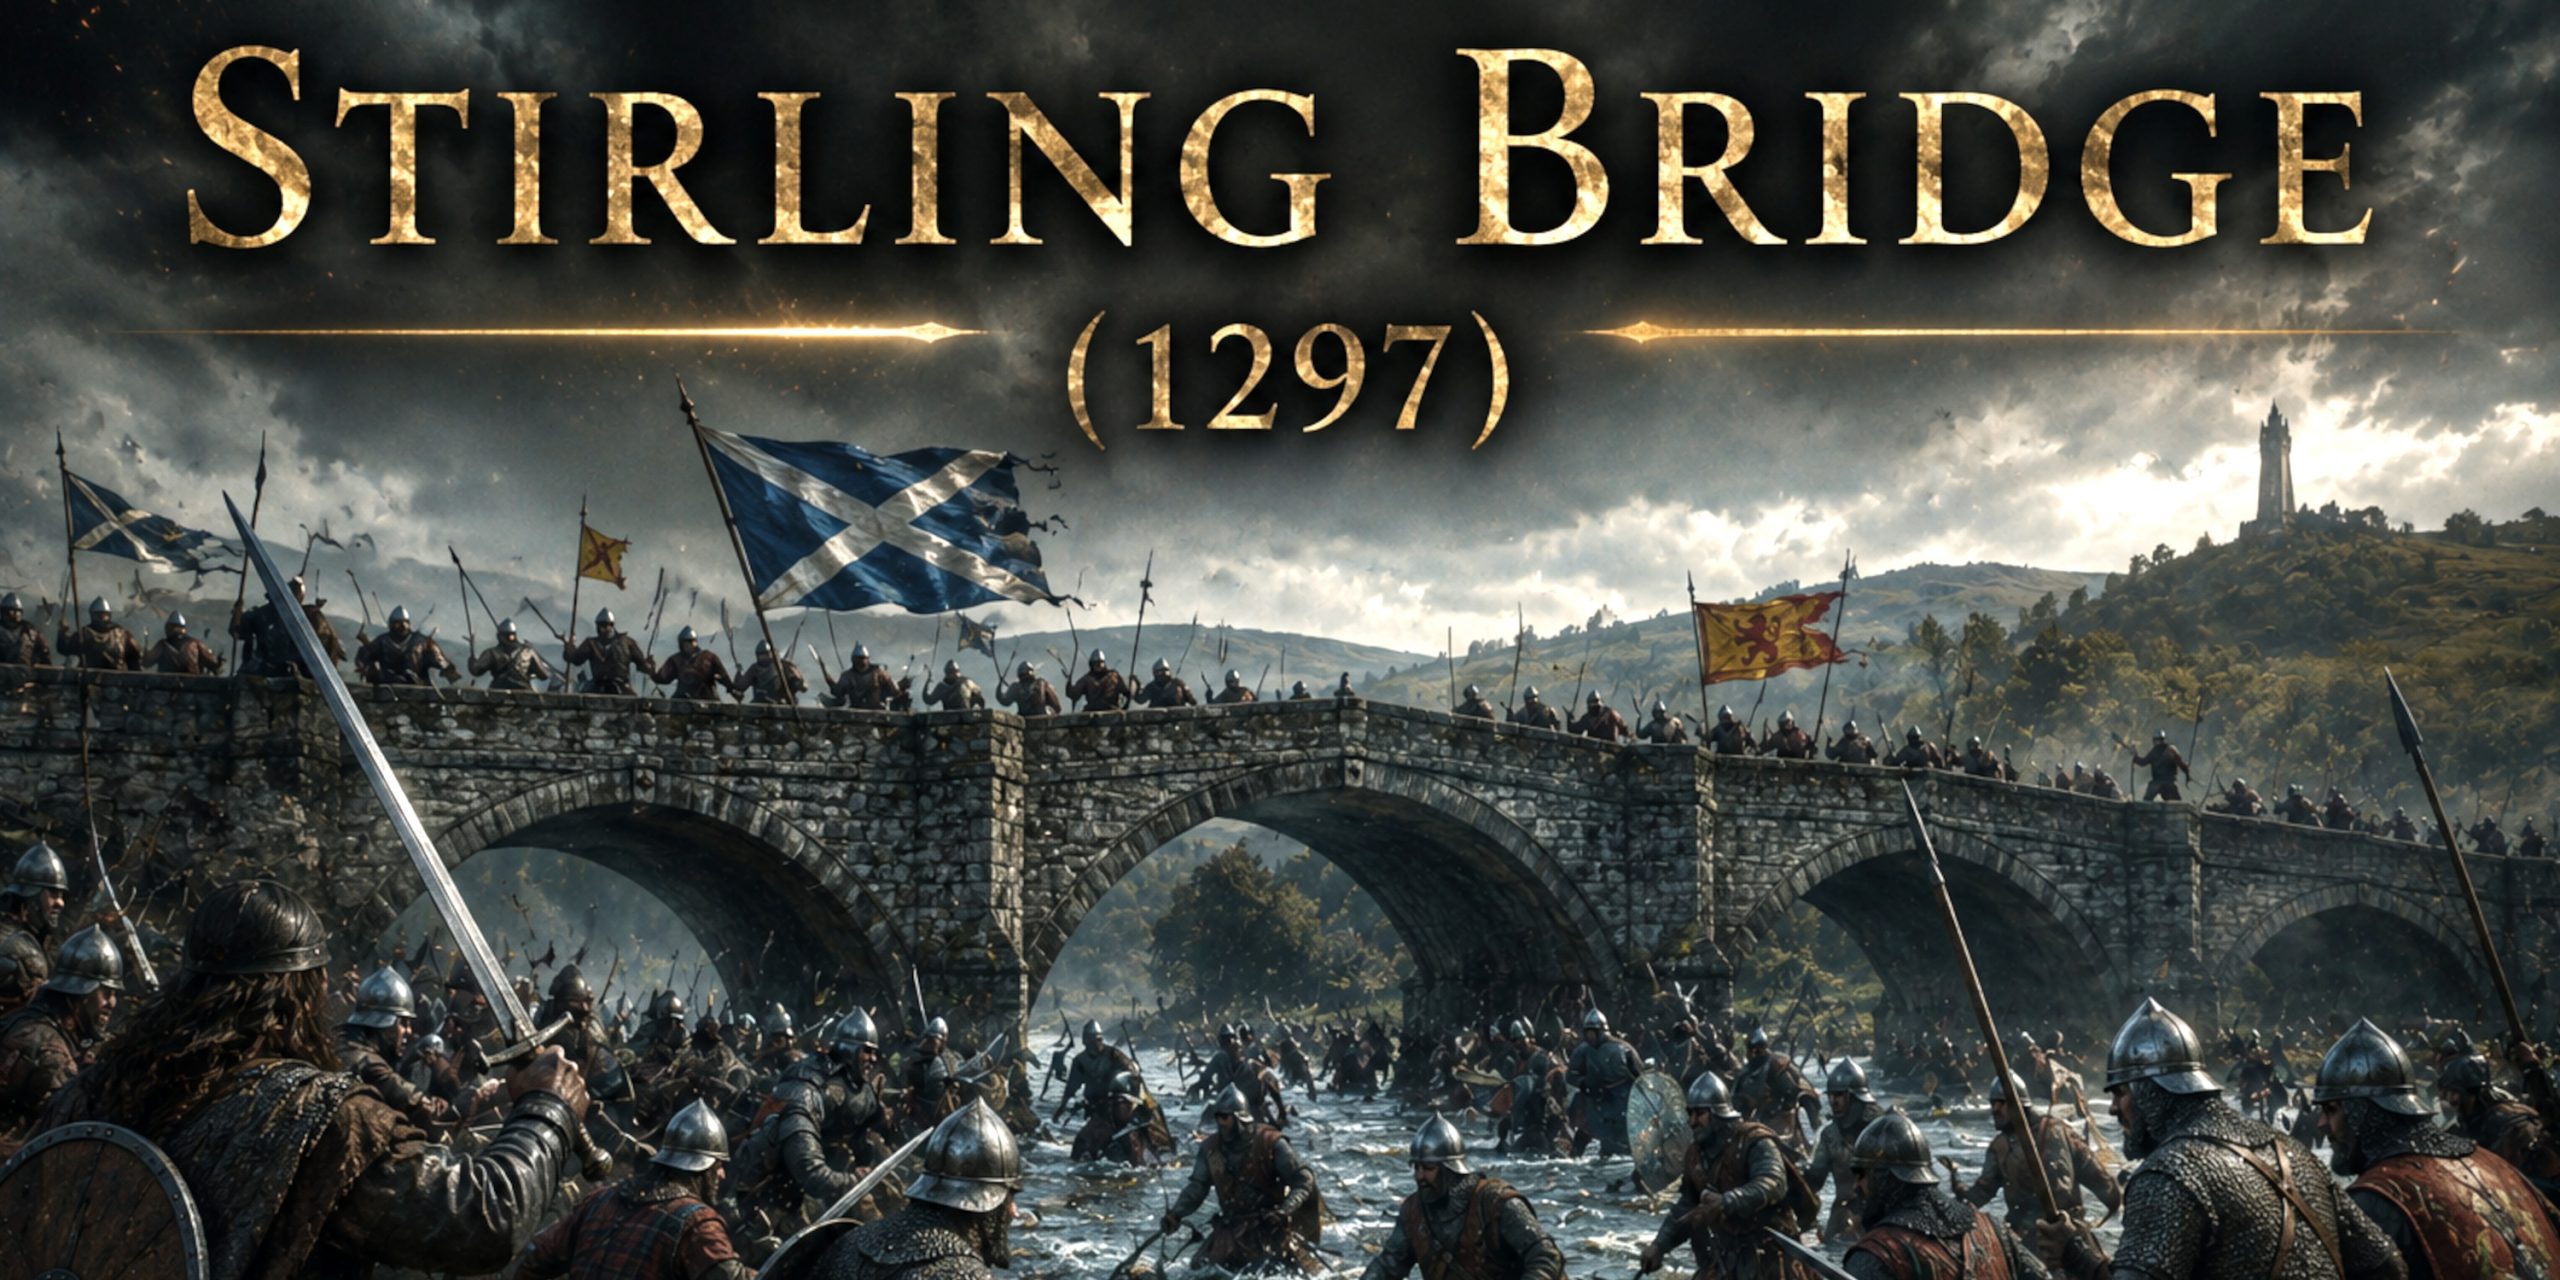
The Battle of Stirling Bridge, fought on 11 September 1297, stands among the most remarkable victories in British military history. Against an English army that was larger, wealthier and far better equipped, a Scottish force commanded by William Wallace and Andrew Moray shattered Edward I’s attempt to regain control of Scotland. It was a battle won not through overwhelming strength but through patience, careful planning and a ruthless understanding of terrain.
Popular culture has often transformed Stirling Bridge into something it never was. Hollywood famously removed the bridge altogether, despite the fact that it was the single most important feature of the battlefield. In reality, the narrow crossing over the River Forth determined almost every decision made that September morning. Wallace did not defeat the English by charging heroically across an open field. He allowed his opponent to trap himself.
As a historian, that is perhaps the most fascinating aspect of the battle. Medieval warfare is often imagined as a chaotic collision of knights and infantry. Stirling Bridge reminds us that intelligence could matter just as much as courage. Wallace recognised an opportunity that many commanders would have missed. The English failed to appreciate the danger until it was too late.
The victory transformed Wallace from a regional rebel into the Guardian of Scotland. It also demonstrated that England’s formidable armies were not invincible. Although Edward I would eventually recover control after the Battle of Falkirk the following year, Stirling Bridge became one of the defining moments of the Scottish Wars of Independence.
The Road to Stirling Bridge
The death of Alexander III in 1286 created a succession crisis that left Scotland politically fragile. His granddaughter, Margaret, Maid of Norway, was intended to inherit the throne but died before reaching Scotland in 1290. With no clear monarch, several powerful nobles claimed the crown.
Edward I of England saw an opportunity. Acting as arbitrator between the competing claimants, he insisted that the Scottish nobility acknowledge him as feudal overlord before he would make a decision. John Balliol eventually became king in 1292, but his authority was constantly undermined by Edward’s interference.
Relations deteriorated rapidly.
When England entered war with France in 1294, Edward demanded Scottish military support. Instead, the Scots formed the Auld Alliance with France. Edward regarded this as open rebellion.
His response was swift and brutal.
In 1296 he invaded Scotland, stormed Berwick with extraordinary bloodshed and defeated King John Balliol at the Battle of Dunbar. Balliol was stripped of his kingdom, earning the mocking nickname “Toom Tabard”, or Empty Coat, because his royal arms were symbolically removed.
By the end of 1296, England appeared to have conquered Scotland.
Edward carried off the Stone of Destiny to Westminster, installed English governors across the kingdom and expected little further resistance.
He was mistaken.
The Scottish Rising
During 1297 resistance emerged across Scotland.
In the south-west, William Wallace killed the English sheriff William Heselrig at Lanark. The event rapidly became legendary, although later chroniclers almost certainly embellished parts of the story.
At roughly the same time in northern Scotland, Andrew Moray escaped imprisonment and launched a separate rebellion centred around Moray and Inverness.
For much of the summer the two leaders fought independently.
English garrisons were attacked.
Supply routes were disrupted.
Sheriffs found themselves increasingly isolated.
Castles that had seemed secure only months earlier became vulnerable.
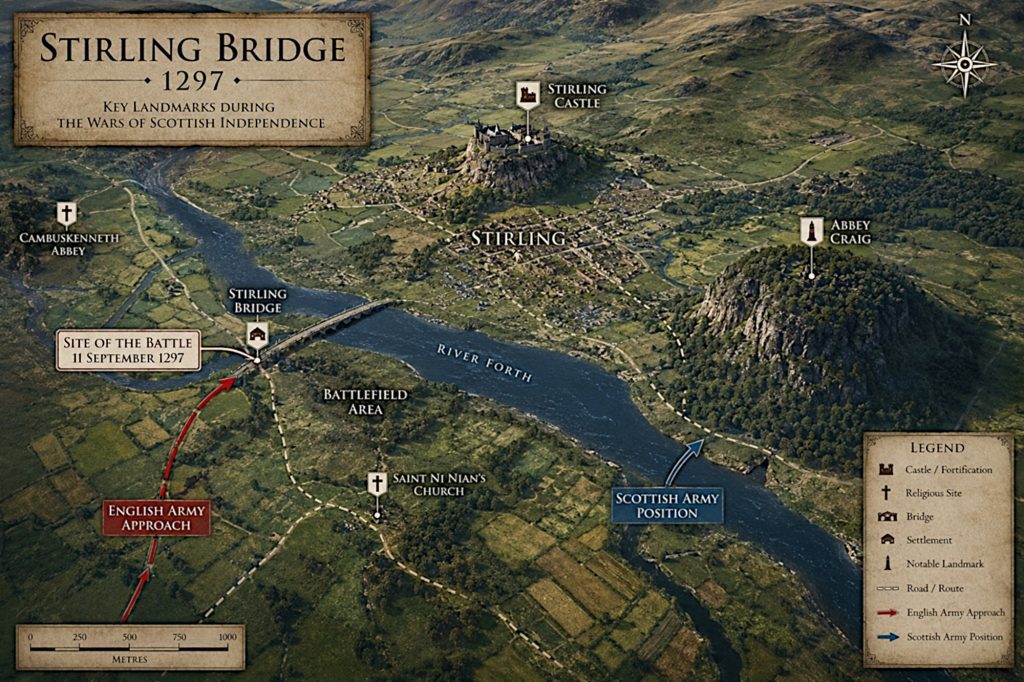
By late summer Wallace and Moray united their forces. Their combined army marched towards Stirling, where the River Forth formed one of the most important crossing points in Scotland.
If the English wished to move north, they would almost certainly have to cross there.
Wallace was waiting.
Why Stirling Was So Important
Modern visitors often underestimate Stirling’s strategic importance because bridges are now plentiful. In the late thirteenth century they were exceptionally rare.
The River Forth formed a significant natural obstacle.
Large armies could not simply march across wherever they pleased.
Safe crossing points were limited to:
- Stirling Bridge
- A handful of difficult fords that depended heavily on water levels
- Ferries unsuitable for moving thousands of troops quickly
Whoever controlled Stirling effectively controlled movement between northern and southern Scotland.
Edward I understood this perfectly.
His commanders therefore assembled an army under John de Warenne, Earl of Surrey, accompanied by Hugh de Cressingham, Edward’s Treasurer in Scotland.
Their objective appeared straightforward.
March to Stirling.
Cross the bridge.
Destroy Wallace’s army.
Restore English authority.
On paper it looked almost inevitable.
Reality proved rather different.
The Battlefield
One of the greatest strengths of the Scottish position lay in the landscape itself.
The battlefield was dominated by several natural features:
| Feature | Military Importance |
|---|---|
| River Forth | Protected one flank and restricted movement |
| Stirling Bridge | Narrow crossing that allowed only a limited number of soldiers across at one time |
| Abbey Craig | Excellent observation point overlooking the battlefield |
| Marshy ground | Slowed cavalry and limited deployment |
| Open meadows | Became crowded once English troops crossed |
The medieval bridge was probably constructed from timber resting on stone piers.
It was narrow.
Very narrow.
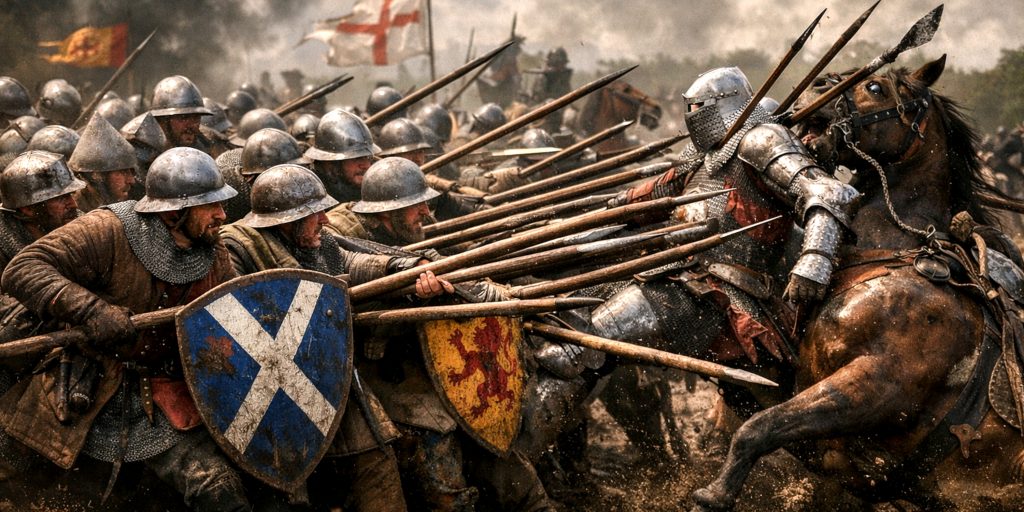
Only a small number of horsemen could cross abreast. Estimates vary, but perhaps two mounted knights or a handful of infantry could move side by side.
That meant thousands of English soldiers would require hours to cross.
Wallace recognised exactly what that meant.
Instead of attacking the bridge itself, he waited until enough English troops had crossed to become isolated from the rest of their army.
Then he intended to destroy them before reinforcements could arrive.
Simple.
Brilliant.
Utterly devastating.
The Opposing Commanders
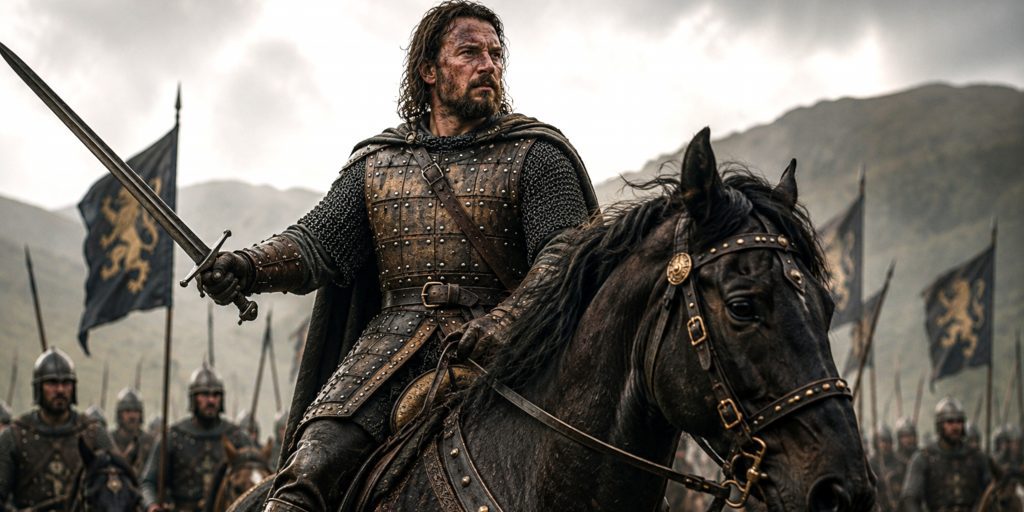
William Wallace
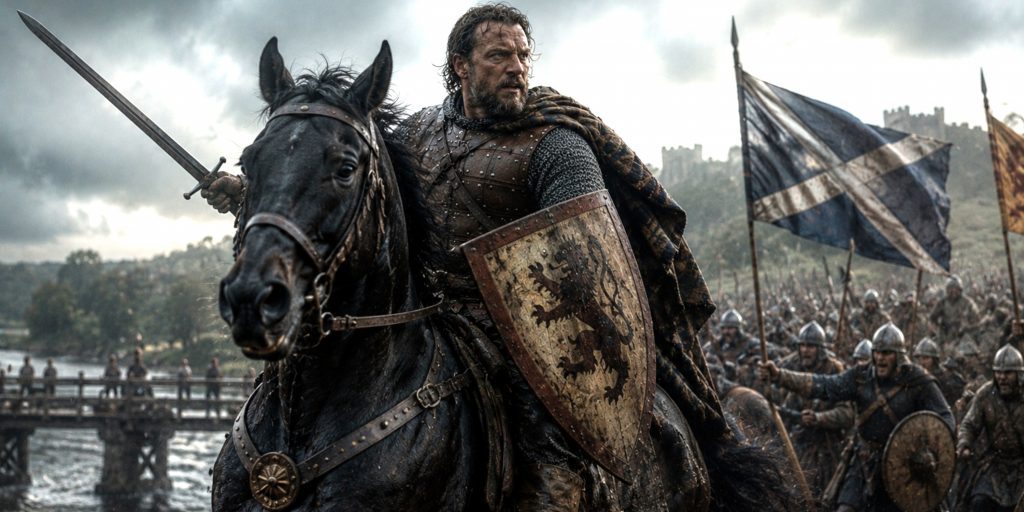
Although Wallace remains Scotland’s national hero, surprisingly little is known with certainty about his early life.
He was probably born around 1270 into the lesser Scottish nobility.
Unlike many romantic portrayals, there is no convincing evidence that he was a poor farmer who suddenly became a military genius overnight. He almost certainly possessed military experience and enough education to understand contemporary warfare.
His greatest quality was not personal strength, although later stories delighted in exaggerating it.
It was judgement.
At Stirling Bridge he displayed remarkable patience, refusing to be provoked into attacking before conditions favoured him.
Andrew Moray
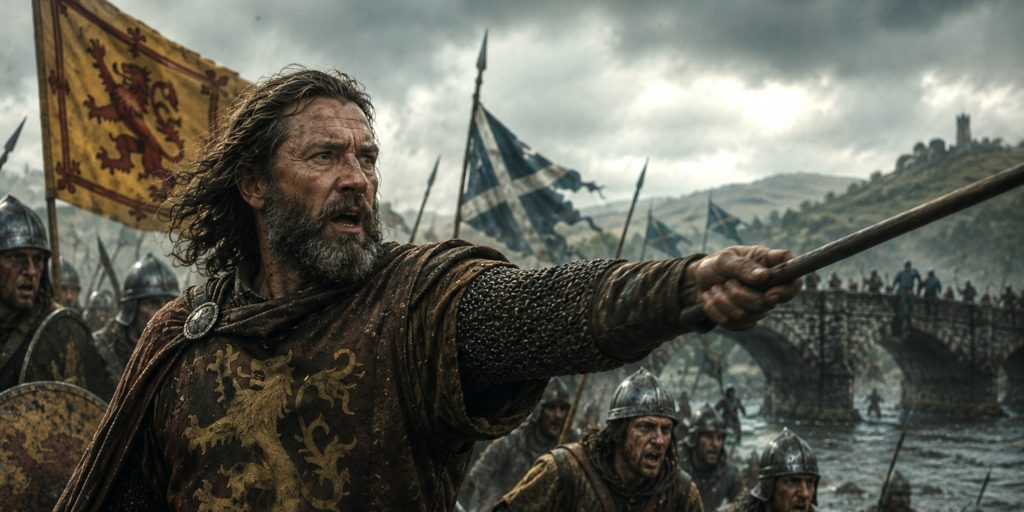
Modern history has increasingly recognised Andrew Moray’s importance.
For centuries Wallace received almost all the attention.
That is unfair.
Moray had already conducted an impressive campaign across northern Scotland before joining Wallace. Contemporary documents often place the two men on equal footing.
Many historians believe Moray may have been every bit as capable a commander as Wallace.
Sadly, he suffered wounds during the battle that later proved fatal.
Had he survived, Scottish history might have unfolded rather differently.
John de Warenne
The Earl of Surrey was an experienced nobleman with considerable military service.
However, by 1297 he was ageing and reportedly reluctant to fight.
Some chroniclers even suggest he wished to delay operations until more favourable circumstances emerged.
Whether entirely fair or not, his army appeared uncertain and divided during the crucial hours before battle.
Hugh de Cressingham
If Wallace became the hero of Stirling Bridge, Hugh de Cressingham became its villain.
As Edward’s chief financial administrator in Scotland, he was deeply unpopular.
Contemporary chroniclers portray him as arrogant and overconfident, although medieval writers were rarely kind to defeated officials.
His insistence on crossing the bridge quickly may have contributed directly to the English disaster.
History remembers him for another reason entirely.
His body was reportedly flayed after the battle, with strips of skin allegedly kept as grisly trophies.
Medieval warfare could be remarkably unpleasant, even by medieval standards.
Forces at the Battle of Stirling Bridge
Precise troop numbers remain one of the great debates surrounding Stirling Bridge. Medieval chroniclers had an unfortunate habit of treating army sizes as works of fiction rather than mathematics. Some inflated figures to glorify victory, while others reduced them to soften defeat.
Modern historians therefore rely on surviving administrative records, pay rolls and logistical evidence rather than medieval estimates.
The English almost certainly outnumbered the Scots, but not by the overwhelming margins sometimes claimed. More importantly, the English advantage in cavalry counted for little once the battle began.
| Army | Estimated Strength | Commander |
|---|---|---|
| Kingdom of Scotland | 5,000 to 7,000 | William Wallace and Andrew Moray |
| Kingdom of England | 8,000 to 10,000 | John de Warenne, Earl of Surrey |
The key difference lay not simply in numbers, but in composition.
England possessed one of the finest professional military systems in Europe. Edward I’s armies regularly campaigned in Wales, France and Scotland. His commanders expected discipline, organisation and decisive offensive action.
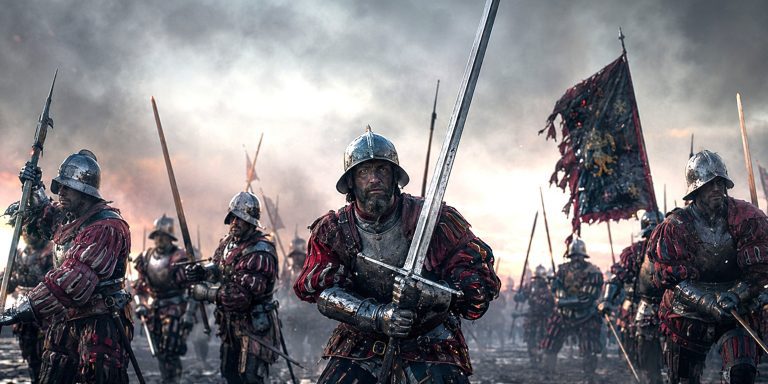
The Scottish army was very different. It consisted largely of local levies, free tenants and lesser nobles drawn together by the growing rebellion. Few were full-time soldiers, but many had experience of local warfare, hunting and border fighting. Most importantly, they knew the terrain intimately.
That local knowledge became a weapon in its own right.
Scottish Army
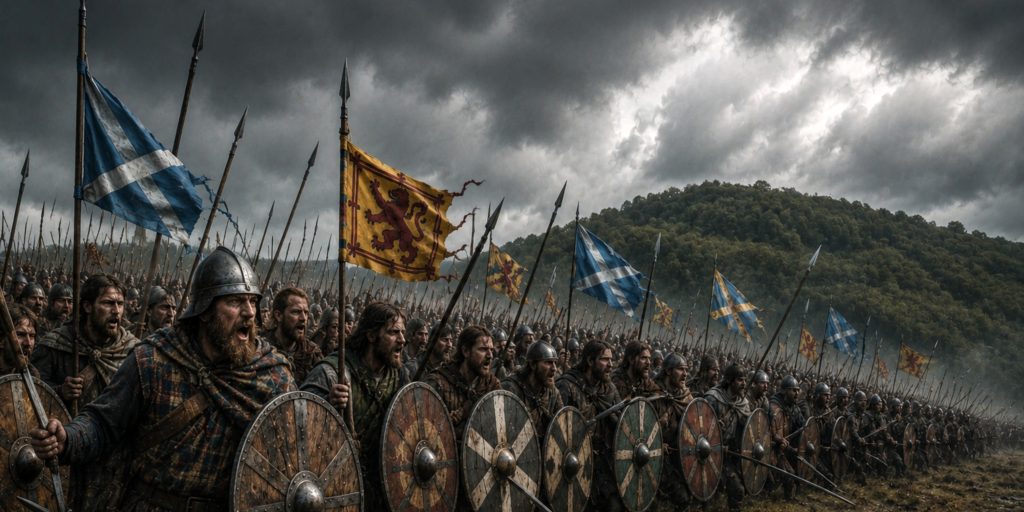
Wallace and Moray commanded a force that reflected medieval Scotland itself. It lacked large numbers of heavily armoured knights but compensated through disciplined infantry and effective leadership.
Scottish troop composition
| Unit | Estimated Numbers | Battlefield Role |
|---|---|---|
| Spearmen | 4,000 to 5,000 | Main fighting force |
| Light infantry | 500 to 1,000 | Supporting attacks and pursuit |
| Archers | Several hundred | Limited missile support |
| Cavalry | Fewer than 200 | Scouts and communications |
The backbone of the army was the infantry.
Scottish spearmen fought in tightly packed formations that later became famous as schiltrons. At Stirling Bridge these formations were probably less sophisticated than those seen later at Bannockburn, but they were already highly effective when fighting on suitable ground.
Each man depended upon those beside him.
The formation could absorb cavalry charges, present an intimidating wall of spear points and push steadily against isolated enemy infantry.
It demanded discipline rather than individual heroics.
English Army
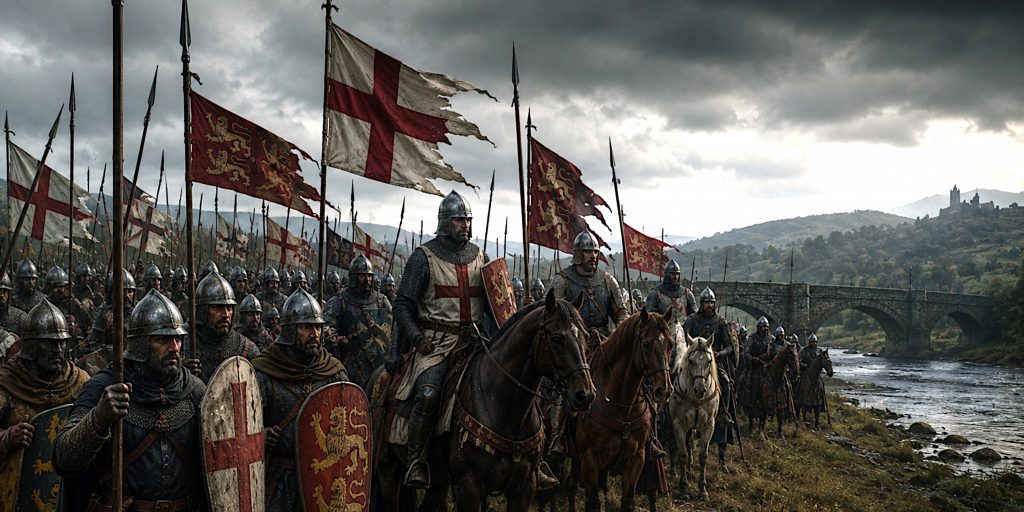
The English army represented the military machine Edward I had spent decades refining.
It combined mounted knights, experienced infantry, professional crossbowmen and Welsh archers into a force capable of campaigning across Britain.
English troop composition
| Unit | Estimated Numbers | Battlefield Role |
|---|---|---|
| Knights and men-at-arms | 300 to 500 | Shock cavalry |
| Heavy infantry | 3,000 to 4,000 | Main battle line |
| Welsh infantry | 2,500 to 3,000 | Spearmen and light troops |
| Archers and crossbowmen | 1,000 to 2,000 | Missile support |
The mounted knights represented England’s greatest military prestige.
A fully armoured knight charging across open ground could devastate poorly organised infantry. Their horses were valuable military assets, trained to remain steady amid noise, blood and confusion.
Unfortunately for the English, Stirling Bridge offered almost no opportunity to exploit cavalry.
The bridge reduced them to a slow procession.
Once across, marshy ground further restricted movement.
It was rather like trying to conduct a cavalry charge through the entrance to a village pub.
Leaders and Military Experience
William Wallace
| Detail | Information |
|---|---|
| Position | Scottish commander |
| Experience | Local warfare and guerrilla campaigning |
| Strengths | Leadership, tactical patience, use of terrain |
| Weaknesses | Limited resources and siege capability |
Wallace understood one fundamental truth.
He could not defeat England by fighting on English terms.
Every decision at Stirling reflected that understanding. Rather than seeking glory through direct confrontation, he manipulated the battlefield until the English advantages became liabilities.
That willingness to wait required confidence. Medieval commanders often faced enormous pressure from impatient followers eager for battle.
Wallace resisted it.
Andrew Moray
| Detail | Information |
|---|---|
| Position | Joint Scottish commander |
| Experience | Northern rebellion against English occupation |
| Strengths | Organisation, local support, strategic planning |
| Weaknesses | Mortally wounded during the battle |
Moray deserves far greater recognition than he often receives.
His northern campaign had already demonstrated impressive operational skill. He captured castles, disrupted English administration and built a substantial following before joining Wallace.
Many modern historians regard Stirling Bridge as very much a joint victory.
John de Warenne, Earl of Surrey
| Detail | Information |
|---|---|
| Position | English commander |
| Experience | Veteran noble and experienced campaigner |
| Strengths | Professional army and experienced officers |
| Weaknesses | Slow decision-making and divided command |
Surrey appears to have recognised some of the risks posed by the bridge.
Several accounts suggest negotiations took place before the battle, with Scottish representatives inviting the English to withdraw.
Whether Surrey genuinely wished to avoid an immediate engagement remains uncertain, but his army ultimately advanced under less than ideal circumstances.
Hugh de Cressingham
| Detail | Information |
|---|---|
| Position | Treasurer of Scotland |
| Experience | Administrator rather than battlefield commander |
| Strengths | Political authority and influence |
| Weaknesses | Overconfidence and impatience |
Cressingham reportedly pushed for an immediate crossing.
From an administrative perspective, delay cost money.
From a military perspective, haste proved catastrophic.
The distinction became painfully obvious once thousands of soldiers found themselves trapped beyond the bridge.
Arms and Armour
One of the most fascinating aspects of Stirling Bridge is the contrast between the equipment carried by each army.
The English enjoyed greater access to expensive armour and imported weapons. The Scots relied more heavily upon practical equipment that could be produced locally or inherited through generations.
Neither side possessed completely uniform equipment. Wealth determined what an individual soldier could afford.
Scottish Arms and Armour
Primary weapons
- Spear, often between 8 and 12 feet long
- Hand axe
- Long knife or ballock dagger
- Mace
- Clubs and agricultural tools among poorer levies
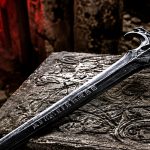
Sword types
Scottish nobles and experienced warriors likely carried swords broadly matching northern European styles of the late thirteenth century.
These included:
| Sword Type | Oakeshott Classification | Use |
|---|---|---|
| Knightly arming sword | Type XII | General combat, cutting and thrusting |
| Broad cutting sword | Type X | Older but still widely used |
| Early tapering sword | Type XIV | Increasingly popular among wealthier warriors |
These were one-handed weapons paired with shields.
The famous two-handed claymore belonged to a much later period and has no place on the battlefield of Stirling Bridge, despite appearing in countless illustrations.
Scottish armour
Typical protection included:
- Padded aketon or gambeson
- Mail hauberk for wealthier warriors
- Iron conical helmet with nasal guard
- Kite or early heater shields
- Leather gloves
- Simple mail chausses among nobles
Many ordinary infantry possessed little more than thick woollen clothing and padded armour.
Against mounted knights this would normally have been dangerous.
Against isolated infantry trapped beside a river, it proved sufficient.
English Arms and Armour
The English army was generally better equipped.
Professional soldiers and knights benefited from equipment representing the highest standards of late thirteenth-century Europe.
Primary weapons
- Heavy lance
- Knightly sword
- Spear
- Dane axe
- Mace
- War hammer
- Crossbows
- Welsh longbows
Sword types
English knights almost certainly carried high-quality arming swords such as:
| Sword Type | Oakeshott Classification | Typical User |
|---|---|---|
| Type XII | Knight | Excellent cutting sword |
| Type XIIa | Mounted knight | Longer blade with greater reach |
| Type XIII | Men-at-arms | Powerful cutting weapon |
These swords were forged for use alongside shields and lances rather than as primary battlefield weapons.
Most fighting still began with spear or lance.
English armour
A fully equipped knight might wear:
- Full-length riveted mail hauberk
- Mail coif
- Iron great helm or cervelliere
- Gambeson beneath mail
- Mail leggings
- Large kite or heater shield
- Spurs indicating knightly rank
Such equipment was expensive enough to equal the value of a substantial estate.
It inspired fear across Europe.
At Stirling Bridge, however, armour could not compensate for poor positioning.
A knight separated from his comrades was simply an isolated man wearing a great deal of iron.
The stage was now set. As dawn broke on 11 September 1297, two armies faced one another across the River Forth. One expected a routine victory. The other was waiting for exactly the right moment to spring its trap.
Battlefield and Terrain
The battlefield at Stirling Bridge was one of the finest examples of terrain dictating the outcome of a medieval battle.
Wallace and Moray did not simply choose a convenient place to meet the English. They selected ground that would steadily dismantle every major advantage possessed by Edward I’s army.
To appreciate why the battle unfolded as it did, it helps to imagine the landscape as it appeared in 1297.
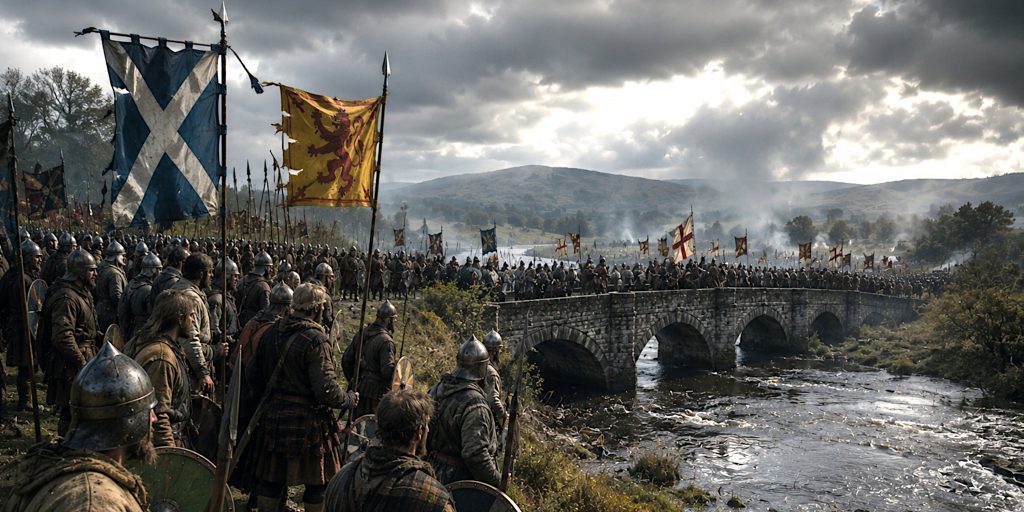
The River Forth was wider and more meandering than today. Extensive marshland bordered much of its course, particularly on the northern bank. Crossing points were scarce, and the bridge itself became a bottleneck through which the English army had little choice but to pass.
The Scottish army occupied higher ground near Abbey Craig, giving Wallace and Moray an excellent view of English movements. From there they could watch every company that crossed the bridge.
They did not need to guess when to attack.
They could simply count.
Key Features of the Battlefield
| Feature | Advantage to the Scots | Disadvantage to the English |
|---|---|---|
| Stirling Bridge | Limited English reinforcements | Created a dangerous bottleneck |
| River Forth | Protected one flank | Restricted retreat |
| Marshland | Reduced cavalry effectiveness | Trapped infantry in confined ground |
| Abbey Craig | Excellent observation point | Allowed Scots to monitor every movement |
| Narrow deployment area | Favoured disciplined infantry | Prevented the English forming a proper battle line |
The English could never deploy their entire army at once.
Only those who had crossed the bridge could fight.
Those still waiting on the southern bank could do little except watch events unfold.
It was an extraordinary tactical handicap.
Why Didn’t the English Cross Elsewhere?
This question has puzzled historians for centuries.
There were shallow fords on the River Forth, but they were difficult to locate, dependent upon water levels and unsuitable for moving thousands of men quickly.
One English knight, Sir Richard Lundie, reportedly suggested using a ford upstream that could allow cavalry to outflank the Scots.
According to later chroniclers, Hugh de Cressingham rejected the proposal, arguing that delay would merely increase costs.
Whether this conversation occurred exactly as described remains uncertain.
What is clear is that the English chose the bridge.
That decision determined the battle before the first sword was drawn.
Battle Timeline
| Time | Event |
|---|---|
| Early morning | English army assembles south of the bridge |
| Around dawn | First English troops begin crossing |
| Following hours | Knights and infantry continue to cross in small groups |
| Late morning | Wallace and Moray wait while English numbers increase |
| Approximately mid-morning | Scots launch their attack |
| Minutes later | Bridge becomes blocked as English attempt to reinforce |
| Shortly afterwards | Hugh de Cressingham is killed |
| Late morning | English force north of the river collapses |
| Afternoon | Remaining English army retreats south |
Exact times cannot be established with certainty, but the overall sequence is well supported by contemporary accounts.
The remarkable feature is not how long the battle lasted.
It is how quickly it ended once Wallace attacked.
The Battle Begins
The morning opened quietly.
English banners gathered on the southern bank of the River Forth while commanders considered their options. Wallace and Moray remained on higher ground, watching patiently.
For English soldiers, the Scottish inactivity may have appeared encouraging.
No attack came.
No arrows darkened the sky.
No cavalry emerged from the hills.
Instead, the Scots simply waited.
Company after company crossed the bridge.
Mounted knights led the advance, followed by infantry and supporting troops.
Slowly, a sizeable English force assembled north of the river.
Still Wallace did nothing.
To modern readers this restraint may seem obvious.
To medieval commanders it was exceptionally disciplined.
Every instinct urged an army to strike before an enemy gained strength.
Wallace resisted that temptation because he understood the bridge was doing his work for him.
The Trap Closes
Eventually enough English troops had crossed to create a dangerous imbalance.
Those north of the river believed reinforcements would continue arriving behind them.
Those south of the river assumed their comrades could hold until everyone had crossed.
Neither assumption proved correct.
Wallace judged the moment perfectly.
Scottish infantry surged downhill towards the English position.
Their objective was not simply to defeat the enemy.
It was to seize control of the northern end of the bridge.
Once that happened, the English force beyond the river became isolated.
No reinforcements could reach them.
No organised retreat remained possible.
What had looked like an orderly crossing suddenly became a death trap.
Wallace’s Attack
Scottish spearmen advanced in disciplined formations.
Rather than scattering into individual combat, they maintained cohesion, presenting dense ranks of spear points that steadily compressed the English.
The ground worked against the invaders at every stage.
Knights struggled to manoeuvre.
Infantry became crowded together.
Horses found little room to gather momentum.
Meanwhile the Scots, fighting on familiar ground, continued to press forward.
The English line began to buckle.
Confusion spread rapidly.
Some soldiers attempted to retreat towards the bridge.
Others pushed forwards, unaware that escape routes were already disappearing.
Within minutes hundreds of frightened men converged upon the narrow crossing.
The bridge itself became choked with soldiers, horses and equipment.
Panic replaced discipline.
Death of Hugh de Cressingham
Among those caught in the fighting was Hugh de Cressingham.
The English treasurer was killed during the Scottish assault.
Several medieval chroniclers describe his death in gruesome detail.
According to the Scalacronica and later Scottish traditions, Wallace’s followers stripped skin from Cressingham’s body after the battle, supposedly using it to fashion sword belts or trophies.
Whether every detail is literally true remains impossible to prove.
Medieval chroniclers delighted in dramatic stories, particularly when describing hated officials.
Even if exaggerated, the tale illustrates the depth of resentment felt towards English rule.
Cressingham had become a symbol of occupation.
His death therefore carried enormous political significance.
Collapse of the English Army
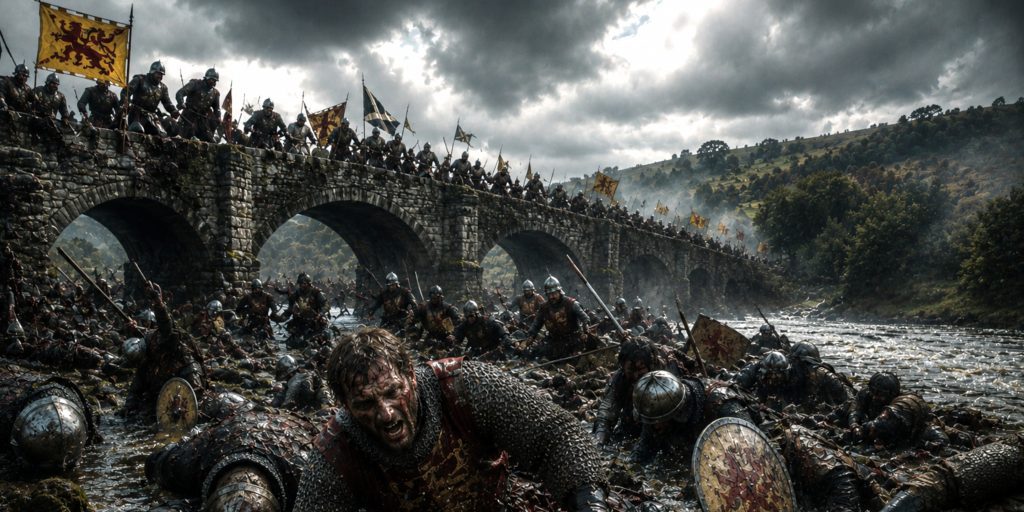
The isolated English force north of the river fought hard.
Many knights attempted repeated counter-attacks, but there was simply too little room to deploy effectively.
The bridge behind them had become impassable.
Some soldiers tried to swim the River Forth.
Many drowned beneath the weight of mail armour.
Others were swept away by the current.
Those who remained were gradually surrounded and overwhelmed.
On the southern bank, the Earl of Surrey faced an impossible situation.
His army remained largely intact.
Yet there was no practical way to reinforce the men already trapped across the river.
According to several accounts, the bridge was eventually destroyed, either collapsing under pressure or deliberately broken to prevent further losses.
Whatever the precise sequence, the result was the same.
The English abandoned the field.
A battle expected to restore English authority had become one of the greatest military disasters of Edward I’s reign.
Contemporary Accounts
Although surviving sources differ on details, they broadly agree on the decisive nature of the Scottish victory.
Walter of Guisborough described how the English became trapped after crossing the bridge and suffered catastrophic losses because they could not deploy effectively.
The Lanercost Chronicle, written from an English perspective, likewise acknowledged the disaster, noting that the English army was overwhelmed after crossing in insufficient numbers.
Perhaps the most famous account comes from the Scottish poet John Barbour in The Brus, written later in the fourteenth century:
“They attacked them so fiercely that they could not withstand the assault.”
Although Barbour was writing decades after the event, his work reflects how Stirling Bridge had already entered Scottish national memory as a triumph of courage and intelligent leadership.
The English chronicles, meanwhile, offer something almost as revealing.
They devote considerable attention to explaining how the defeat happened.
Victorious armies rarely need excuses.
Defeated ones often produce rather a lot of them.
Casualties
Determining the exact number of casualties at Stirling Bridge is impossible. Medieval chroniclers were far more interested in celebrating victory or lamenting defeat than compiling accurate statistics. Even so, there is broad agreement that the English suffered devastating losses while Scottish casualties were comparatively light.
Modern historians generally offer cautious estimates.
| Army | Estimated Casualties |
|---|---|
| Scotland | Several hundred, possibly fewer |
| England | 2,000 to 5,000 killed, wounded or captured |
The most significant English losses occurred among the troops who had already crossed the bridge. Many were cut down in combat, while others drowned attempting to escape across the River Forth. Heavy mail armour, excellent protection on dry land, became a deadly burden in deep water.
Several senior English knights were killed or captured, while Hugh de Cressingham became the most prominent casualty.
The Scottish victory was not simply tactical.
It destroyed a substantial portion of England’s field army in Scotland and shattered the aura of English military superiority.
Why Wallace Won
The Battle of Stirling Bridge is sometimes presented as an unlikely triumph achieved through bravery alone.
Bravery certainly mattered.
It simply was not the deciding factor.
Wallace and Moray won because they consistently made better decisions than their opponents.
Superior use of terrain
The narrow bridge prevented the English from bringing their numerical superiority to bear.
Instead of facing an entire army, the Scots fought only a fraction of it.
The bridge became the English army’s greatest weakness.
Patience
Perhaps Wallace’s greatest achievement was resisting the temptation to attack too early.
Every additional English soldier crossing the bridge strengthened the force immediately in front of him.
At the same time, it increased the number of men who would become trapped once the attack began.
Knowing precisely when not to fight is one of the rarest military skills.
Effective infantry
Scottish spearmen remained disciplined throughout the engagement.
Rather than pursuing scattered opponents too soon, they maintained formation and steadily compressed the English into an ever-smaller area.
The battle demonstrated that well-led infantry could defeat mounted knights under the right conditions.
English mistakes
Several factors contributed to the English defeat.
- Crossing a narrow bridge in small groups
- Failing to secure sufficient ground beyond the crossing
- Underestimating Wallace and Moray
- Poor communication between commanders
- Limited room to deploy cavalry
None of these mistakes alone guaranteed defeat.
Combined, they proved catastrophic.
Immediate Aftermath
The victory transformed the political landscape of Scotland.
English control north of the River Forth collapsed almost overnight. Castles that had appeared secure suddenly found themselves isolated, while Scottish nobles who had hesitated to support the rebellion began reassessing their loyalties.
Wallace and Moray rapidly exploited their success.
Scottish forces advanced into northern England, conducting raids that demonstrated the kingdom was once again capable of taking the offensive.
For Edward I, the defeat was deeply embarrassing.
He was campaigning in Flanders when news reached him. The king immediately began planning a major expedition to recover Scotland.
Andrew Moray, however, would not live to see the next campaign.
Although he survived the battle itself, wounds received during the fighting proved fatal a few months later.
His death deprived Scotland of one of its finest commanders at precisely the moment it needed experienced leadership.
Wallace was subsequently appointed Guardian of Scotland, ruling in the name of the absent King John Balliol.
It was an extraordinary rise.
Only months earlier he had been one rebel leader among many.
Now he effectively governed the kingdom.
Archaeology
Unlike battlefields such as Towton or Visby, Stirling Bridge has produced relatively little archaeological evidence directly linked to the fighting.
There are several reasons for this.
The landscape has changed considerably since 1297.
The River Forth has altered its course.
Flooding and centuries of agriculture have disturbed the battlefield.
Urban expansion around Stirling has also limited opportunities for large-scale excavation.
Nevertheless, archaeology continues to improve our understanding of the battlefield.
Important archaeological discoveries
- Investigation of the medieval bridge has helped establish its likely dimensions and crossing capacity.
- Landscape surveys have reconstructed the marshes that once restricted movement.
- Medieval weapon fragments recovered from the wider Stirling area support written evidence for military activity.
- Environmental studies confirm that much of the surrounding ground would have been unsuitable for large cavalry manoeuvres.
Modern technologies such as LiDAR and geophysical surveys continue to refine historians’ understanding of troop movements and the medieval landscape.
Each new survey reinforces the same conclusion.
The bridge itself was central to the battle.
Contemporary Quotes
Although surviving accounts were written from differing perspectives, several capture the scale of the English disaster.
Walter of Guisborough described how the English became trapped after crossing the river and were unable to receive support from the remainder of the army.
The Lanercost Chronicle recorded that many English soldiers were killed before the rest of the army could cross, acknowledging the devastating consequences of the restricted crossing.
The Scottish poet John Barbour later celebrated Wallace’s leadership in The Brus:
“The Scots rushed upon them with such force that they could not endure the attack.”
Although Barbour wrote decades after the battle, his work reflects the importance Stirling Bridge had already acquired within Scottish national identity.
Legacy
Few medieval battles have had such an enduring influence on national memory.
Militarily, Stirling Bridge proved that disciplined infantry, intelligent leadership and careful use of terrain could defeat one of Europe’s strongest armies.
Politically, it transformed the Scottish rebellion into a genuine war of independence.
Psychologically, it inspired resistance across Scotland.
The victory did not secure independence on its own. Edward I returned the following year with another powerful army, defeating Wallace at the Battle of Falkirk.
Yet even Falkirk could not erase what had happened at Stirling.
The lesson remained.
England could be beaten.
Robert the Bruce would later apply many of the same principles at Bannockburn in 1314, again forcing English troops to fight on ground that neutralised their cavalry.
In that sense, Stirling Bridge became the blueprint for Scotland’s greatest military victories.
Visiting the Battlefield Today
Stirling remains one of the finest places in Britain to explore medieval history.
Visitors can easily combine several important sites in a single day.
National Wallace Monument
Standing atop Abbey Craig, the monument overlooks much of the battlefield.
The views explain immediately why Wallace chose this position. From the summit, the relationship between the bridge, river and surrounding landscape becomes strikingly clear.
Inside the monument are exhibitions dedicated to Wallace, the Wars of Independence and Scotland’s medieval history.
Old Stirling Bridge
Although not the bridge fought over in 1297, the surviving medieval bridge stands close to the original crossing.
Walking across it offers an excellent appreciation of how narrow medieval river crossings could be.
It is easy to imagine the confusion that would have developed as hundreds of soldiers attempted to retreat across such limited space.
Stirling Castle
One of Scotland’s greatest castles dominates the skyline above the battlefield.
Its exhibitions place the battle within the wider history of medieval Scotland and the Wars of Independence.
Frequently Asked Questions
Who won the Battle of Stirling Bridge?
The Scottish army led jointly by William Wallace and Andrew Moray defeated the English army commanded by John de Warenne, Earl of Surrey.
Why was the bridge so important?
The narrow bridge prevented the English from deploying their full army. Wallace attacked while only part of the English force had crossed, isolating and destroying it.
Did William Wallace fight alone?
No. Andrew Moray was an equal commander during the campaign and played a vital role in planning and leading the victory.
Was the battle like the film Braveheart?
No. The film omits the bridge entirely, despite it being the defining feature of the battle. It also takes considerable liberties with armour, tactics and historical events.
Can you visit the battlefield?
Yes. The Wallace Monument, Old Stirling Bridge and Stirling Castle all provide excellent opportunities to explore the history of the campaign.