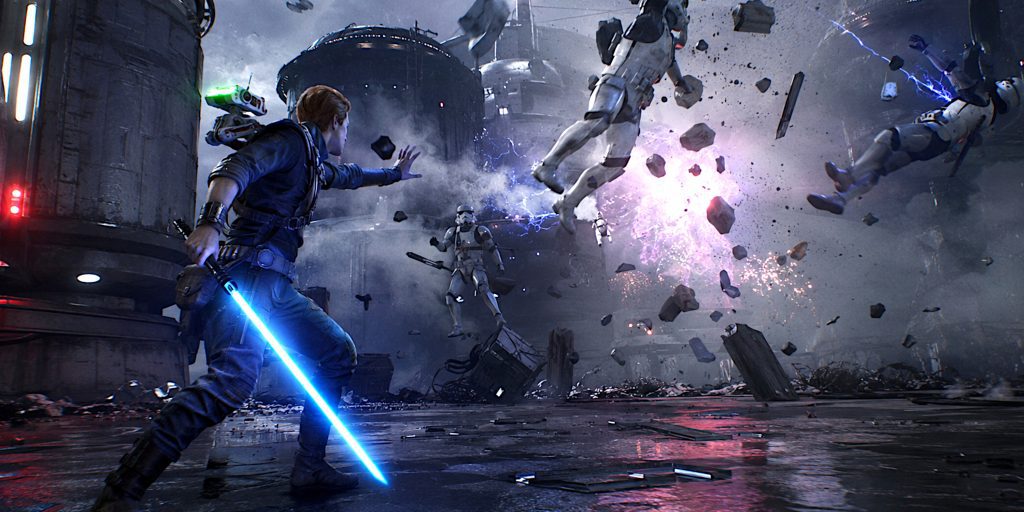
Star Wars Jedi: Survivor gives Cal Kestis five lightsaber stances, nine skill trees and a sizeable collection of perks. That sounds wonderfully liberating until you reach a meditation point and spend ten minutes wondering whether “more Force” is actually more useful than “slightly angrier lightsaber”.
The good news is that there is no single build capable of making every other setup redundant. Each stance has a clear purpose, while perks allow you to strengthen a particular combat style or soften its weaknesses. You can also reset your skill points, so experimentation is encouraged rather than punished.
This guide covers the strongest builds for aggressive players, defensive fighters, Force specialists, ranged combatants, explorers and anyone brave enough to play on Jedi Grand Master.
Best Jedi: Survivor builds at a glance
| Playstyle | Primary stance | Secondary stance | Essential perks | Best suited to |
|---|---|---|---|---|
| Balanced Jedi | Single | Double-Bladed | Resilience, Shatter, Fortification | First playthroughs and general exploration |
| Aggressive duellist | Dual Wield | Double-Bladed | Precision, Shatter, Fortitude | Fast combat and relentless pressure |
| Defensive survivor | Crossguard | Single | Resilience, Fortification, Persistence | Patient players and difficult bosses |
| Blaster gunslinger | Blaster | Double-Bladed | Marksmanship, Ambidexterity | Ranged enemies and mixed encounters |
| Force specialist | Single | Double-Bladed | Equilibrium, Flux, Perplexity | Crowd control and Confusion abilities |
| Grand Master build | Dual Wield | Single | Precision, Shatter, Resilience | High-difficulty parrying |
| New Journey Plus | Any preferred pairing | Any complementary stance | Purity or Warrior | A more dangerous second playthrough |
There are ten perk slots available in total. Cal begins with three, while the remaining slots are earned through exploration, Jedha puzzles and a purchase from Zee’s shop. Several powerful perks consume two, three or even four slots, so the real challenge is not finding good perks. It is persuading them all to fit.
How builds work in Jedi: Survivor
A complete build has four parts:
- Two equipped lightsaber stances
- Skills purchased within those stance trees
- Survival, Force and lightsaber skills
- Perks equipped at a meditation point
Only two stances can be carried at once. You can change them at meditation points or workbenches, but not freely during combat. A strong pairing should therefore cover different situations rather than doing the same job twice.
The Double-Bladed stance, for example, is excellent against crowds and repeated blaster fire. Pairing it with Crossguard gives Cal a heavy single-target option. Combining it with Dual Wield produces a faster build that can move smoothly between crowd control and close duelling.
Perks work differently. Each consumes a certain number of slots, with stronger effects generally demanding more space. The maximum is ten slots, but you will not reach that total until you have explored a fair portion of the game.
Best balanced build
This is the safest recommendation for a first playthrough. It retains the familiar Single stance while using the Double-Bladed stance whenever the Empire decides that one Cal Kestis is best answered with seventeen stormtroopers.
Recommended setup
| Build element | Selection |
|---|---|
| Primary stance | Single |
| Secondary stance | Double-Bladed |
| Core perks | Resilience, Shatter, Fortification, Equilibrium, Flux |
| Priority skill trees | Survival, Lightsaber, Telekinesis |
| Combat focus | Adaptability and reliable defence |
Why it works
Single stance has no glaring weakness. It delivers respectable damage, offers good mobility and gives Cal several useful gap-closing attacks. Double-Bladed fills the one area where Single can struggle: dense groups of enemies and sustained blaster fire.
Use Single against bosses, heavy melee fighters and isolated targets. Switch to Double-Bladed when facing groups, shielded formations or firing lines.
Best skills
Prioritise:
- Dash Strike and Aerial Assault for closing distance
- Charged Throw for ranged lightsaber damage
- Gathering Tempest for rapid Double-Bladed attacks
- Vortex Dive for reaching distant targets
- Multifold Reflections for dealing with repeated blaster bolts
- Improved and Expert Survival Skills
- Greater Hold for keeping enemies suspended longer
Recommended perks
- Resilience: Increases Cal’s block meter
- Shatter: Makes attacks more effective against enemy block meters
- Fortification: Restores some health after blocking or parrying
- Equilibrium: Strengthens the next lightsaber attack after using a Force ability
- Flux: Regenerates a small amount of Force over time, but reduces the maximum Force meter
This build rarely feels spectacular in the way a full Crossguard swing does. It simply works, which is often more useful than looking heroic for half a second before being kicked off a cliff.
Best aggressive Dual Wield build

Dual Wield is the natural choice for players who want speed, constant pressure and the ability to cancel attacks into a block. It rewards sharp reactions and disciplined aggression rather than frantic button pressing, though the distinction may not be immediately obvious to your controller.
Recommended setup
| Build element | Selection |
|---|---|
| Primary stance | Dual Wield |
| Secondary stance | Double-Bladed |
| Core perks | Precision, Shatter, Fortitude, Dexterity |
| Priority skill trees | Dual Wield, Survival, Jedi Concentration |
| Combat focus | Fast attacks, counters and block damage |
Why it works
Dual Wield excels against individual enemies. Its attack animations can be interrupted to block, allowing Cal to remain aggressive without becoming completely defenceless. Its smaller block meter and limited crowd control are the main weaknesses.
Double-Bladed solves both problems. It handles groups more comfortably and provides stronger protection against volleys of blaster fire. The similar pace of the two stances also makes switching between them feel natural.
Best skills
Prioritise:
- Focused Parry
- Backstep Slash
- Uncoiled Strikes
- Dancing Blades
- Split Reflection
- Gathering Tempest
- Multifold Reflections
- Improved Stim Formula
- The upper branches of Jedi Concentration
Recommended perks
- Precision: Narrows the parry window but inflicts greater block-meter damage
- Shatter: Further improves block-meter damage
- Fortitude: Increases lightsaber damage while also increasing incoming damage
- Dexterity: Increases damage from lightsaber throws
Fortitude makes this build extremely dangerous in both directions. Cal can tear through enemies, but mistakes become expensive. It is excellent for confident players and a questionable life choice for anyone who still tries to parry red attacks.
Best Crossguard power build
Crossguard turns Cal’s lightsaber into something approaching a glowing medieval greatsword. Its swings are slow, heavy and capable of demolishing enemy guards. It is immensely satisfying, provided you learn not to attack merely because the button is available.
Recommended setup
| Build element | Selection |
|---|---|
| Primary stance | Crossguard |
| Secondary stance | Single or Double-Bladed |
| Core perks | Resilience, Shatter, Fortification, Persistence, Centered |
| Priority skill trees | Crossguard, Survival, Telekinesis |
| Combat focus | Guard breaking, punishment and survivability |
Why it works
Crossguard has the greatest damage per hit of any stance, but its lengthy animations leave Cal vulnerable. It performs best when you parry an attack, break the enemy’s guard and answer with one or two deliberate strikes.
Single stance is the smoother secondary option because its attack patterns feel comparatively familiar. Double-Bladed provides better crowd control, but switching between its speed and the slow Crossguard rhythm can feel like changing from drum and bass to a funeral march halfway through a song.
Best skills
Prioritise:
- Greater Cleaving Swing
- Reaching Cleave
- Impact
- Greater Impact
- Charged Reflection
- Rolling Thunder
- Improved and Expert Survival Skills
- Wrenching Pull
Recommended perks
- Resilience: Expands the block meter
- Shatter: Helps break enemy guards
- Fortification: Restores health through successful defence
- Persistence: Restores a small amount of health after defeating an enemy during Slow
- Centered: Staggers nearby enemies when Cal uses a stim
This setup is particularly effective against Bedlam Raiders, large creatures and bosses with substantial block meters. It is less comfortable when small enemies surround Cal, which is why the second stance matters so much.
Best Blaster stance build
The Blaster stance is the least traditionally Jedi option and therefore one of the most entertaining. Cal fights with a lightsaber in one hand and a blaster in the other, apparently having concluded that ancient religious principles are less important than surviving the next ten minutes.
Recommended setup
| Build element | Selection |
|---|---|
| Primary stance | Blaster |
| Secondary stance | Double-Bladed |
| Core perks | Marksmanship, Ambidexterity, Shatter, Resilience, Flux |
| Priority skill trees | Blaster, Survival, Jedi Concentration |
| Combat focus | Ranged damage and controlled aggression |
Why it works
Blaster stance lets Cal damage enemies at range, interrupt certain actions and finish weakened targets without closing the distance. Lightsaber attacks replenish ammunition, creating a rhythm of melee engagement followed by ranged pressure.
Its limitations become apparent against large groups. Double-Bladed stance handles those situations while providing superior blaster reflection and crowd control.
Best skills
Prioritise:
- Flying Lunge
- Blaster Cooldown
- Improved Clip
- Efficient Heat Transfer
- Point Blank
- Quick Draw
- Vortex Dive
- Multifold Reflections
- Attunement and Lucid Attunement
Recommended perks
- Marksmanship: Increases blaster damage while using Blaster stance
- Ambidexterity: Shooting an enemy increases the damage of the next lightsaber attack against that target
- Shatter: Improves damage against enemy guards
- Resilience: Increases the block meter
- Flux: Provides passive Force regeneration at the cost of maximum Force capacity
Point Blank is especially valuable once its timing becomes familiar. It functions as a close-range counter and can turn an aggressive enemy’s attack into an opportunity. The timing takes practice, but so does everything worth doing in this game, including opening the map without accidentally pressing the wrong button.
Best Force build
A Force-focused build is less about lightsaber damage and more about controlling the battlefield. Enemies can be pushed from ledges, pulled into attacks, suspended in the air or persuaded through Confusion to reconsider their employment with the Empire.
Recommended setup
| Build element | Selection |
|---|---|
| Primary stance | Single |
| Secondary stance | Double-Bladed |
| Core perks | Equilibrium, Flux, Perplexity, Shatter, Resilience |
| Priority skill trees | Jedi Concentration, Telekinesis, Confusion |
| Combat focus | Battlefield control and ability combinations |
Why it works
Single stance combines well with Force powers because it can quickly exploit openings created by Push, Pull and Lift. Double-Bladed provides protection when Force reserves are low or multiple enemies close in.
Equilibrium is the centre of the build. After Cal uses a Force ability, his next lightsaber attack deals additional damage. A typical sequence might involve pulling an enemy forward, striking with the enhanced attack and then using the recovered space to control another target.
Best skills
Prioritise:
- Attunement and Lucid Attunement
- Channelling Energy
- Wrenching Pull
- Howling Push
- Soaring Lift
- Mass Slam
- Greater Hold
- Superior Confusion
- Redirected Strength
Recommended perks
- Equilibrium: Enhances the next lightsaber strike after a Force ability
- Flux: Passively restores some Force
- Perplexity: Increases damage inflicted by enemies affected by Confusion
- Shatter: Helps exploit controlled or staggered targets
- Resilience: Provides a useful defensive reserve
Confusion is particularly effective in encounters containing powerful organic enemies. Turn the strongest available target against its companions and let workplace tensions resolve themselves.
The ability is much less useful against bosses and enemies that cannot be influenced. Keep a dependable lightsaber stance equipped for those encounters.
Best defensive and parry build
This build is for players who prefer to observe an enemy, learn its rhythm and dismantle its guard through counters. It is slower than an aggressive setup but considerably safer once the parry timings become familiar.
Recommended setup
| Build element | Selection |
|---|---|
| Primary stance | Single |
| Secondary stance | Crossguard |
| Core perks | Precision, Shatter, Resilience, Fortification, Persistence |
| Priority skill trees | Survival, Single, Crossguard |
| Combat focus | Parries, block management and counterattacks |
Why it works
Single stance provides a forgiving all-purpose moveset. Crossguard delivers the punishment once an enemy’s block meter is broken. Both stances reward deliberate timing rather than extended attack combinations.
Precision makes parrying riskier by narrowing the timing window, but successful parries cause more block damage. Combined with Shatter and a Crossguard counterattack, it can dismantle even heavily defended opponents.
Best skills
Prioritise:
- Improved and Expert Survival Skills
- Improved Stim Formula
- Aerial Assault
- Dash Strike
- Charged Throw
- Greater Cleaving Swing
- Reaching Cleave
- Charged Reflection
Precision should only be equipped once you are comfortable with ordinary parries. If enemies are still hitting Cal before the animation begins, reducing the window will not inspire sudden spiritual growth.
Best Grand Master difficulty build

Jedi Grand Master shortens parry timing, increases incoming damage and makes enemies considerably more aggressive. The best build is therefore one that provides fast defensive responses without relying on long attack animations.
Recommended setup
| Build element | Selection |
|---|---|
| Primary stance | Dual Wield |
| Secondary stance | Single |
| Core perks | Precision, Shatter, Resilience, Fortification, Flux |
| Priority skill trees | Survival, Dual Wield, Jedi Concentration |
| Combat focus | Animation cancellation, parrying and resource management |
Why it works
Dual Wield allows attacks to be cancelled into a block. That is enormously valuable on Grand Master, where committing to one unnecessary swing can cost most of Cal’s health. Single stance provides a more stable alternative for encounters where Dual Wield’s small block meter becomes a liability.
Precision sounds like an odd choice on a difficulty that already demands tight timing. However, experienced players can use its increased block damage to end dangerous exchanges sooner. If the shortened window proves unreliable, replace it with a defensive or healing perk. A theoretically perfect build is no help while Cal is lying face-down on Koboh.
Grand Master priorities
- Upgrade maximum health early
- Collect additional stim canisters
- Improve stim healing
- Learn enemy parry patterns
- Use Force abilities to isolate targets
- Remove ranged enemies before committing to a duel
- Avoid Crossguard unless you understand the opponent’s recovery windows
- Spend skill points on survival before purchasing situational stance abilities
Fortitude is usually too punishing for this build. The additional damage is tempting, but Grand Master enemies already hit hard enough to make their feelings clear.
Best exploration and progression build
Not every build needs to be designed solely around bosses. During the main story, Cal spends far more time exploring, fighting ordinary enemies and earning skill points.
Recommended setup
| Build element | Selection |
|---|---|
| Primary stance | Single |
| Secondary stance | Double-Bladed |
| Core perks | Wisdom, Resilience, Fellowship or Gambler |
| Priority skill trees | Survival, Telekinesis, preferred stance |
| Combat focus | Experience gain and sustainable exploration |
Recommended perks
- Wisdom: Increases experience gained from defeating enemies
- Resilience: Improves blocking capacity
- Fellowship: Allows BD-1 to carry an additional stim
- Gambler: Increases experience gained but prevents lost experience from being restored after death
Wisdom is a sensible choice throughout the story. Gambler offers a greater progression benefit but should only be used if you rarely die. On higher difficulties, it can turn an ordinary mistake into the deletion of a sizeable experience bar. That is technically exciting, although perhaps not in the intended way.
Replace progression perks before major boss encounters. Once Cal has accumulated enough skills, extra experience becomes less valuable than direct combat bonuses.
Best New Journey Plus build
New Journey Plus carries over Cal’s unlocked skills, stances, cosmetics and other progression. It also introduces three special perks:
| Perk | Effect |
|---|---|
| Purity | Massively increases weapon damage for Cal and his enemies |
| Warrior | Replaces standard encounters with more difficult enemy combinations |
| Trendsetter | Randomises Cal’s cosmetics after death |
Purity dramatically changes combat. Lightsabers and blasters become genuinely lethal, but Cal can also die extremely quickly. Traditional damage perks become less important because the perk already raises lethality to absurd levels.
Recommended Purity setup
- Primary stance: Blaster
- Secondary stance: Double-Bladed
- Supporting perks: Resilience, Fortification, Centered and Flux
- Priority: Ranged elimination, defence and crowd control
Blaster is extremely strong with Purity because ranged shots can kill many enemies before they reach Cal. Double-Bladed remains useful for reflecting volleys and controlling groups.
Warrior can be combined with Purity, although doing so produces encounters where almost anything can kill almost anything immediately. It is wonderfully chaotic and about as balanced as giving every stormtrooper a thermal detonator in a narrow lift.
Which stance is best in Jedi: Survivor?
There is no universally superior stance, but some are easier to recommend than others.
| Stance | Greatest strength | Main weakness | Best for |
|---|---|---|---|
| Single | Balanced moveset | Limited specialisation | Beginners and adaptable players |
| Double-Bladed | Crowd control and reflection | Lower single-target damage | Groups and ranged enemies |
| Dual Wield | Speed and attack cancellation | Small block meter | Aggressive duelling |
| Blaster | Ranged pressure | Ammunition management | Tactical and mobile combat |
| Crossguard | Heavy damage and guard breaking | Slow attack animations | Patient, deliberate fighting |
For most players, Single and Double-Bladed is the best general pairing. It answers almost every ordinary combat situation without demanding complete mastery of a specialised mechanic.
For experienced players, Dual Wield and Double-Bladed offers a stronger combination of speed, single-target pressure and crowd control.
The best perks in Jedi: Survivor
Several perks remain valuable across almost every stance:
- Resilience: Cheap, practical and useful on every difficulty
- Shatter: Excellent against guarded enemies and bosses
- Fortification: Rewards successful defensive play with health recovery
- Equilibrium: Strong for players who regularly combine Force powers with lightsaber attacks
- Precision: Powerful in the hands of confident parry-focused players
- Marksmanship: Essential for a dedicated Blaster build
- Wisdom: One of the best progression perks during the story
- Versatility: Useful when a build frequently switches between stances
Fortitude is one of the strongest offensive perks, but its increased incoming damage makes it difficult to recommend universally. On Story Mode or Jedi Padawan, the risk is manageable. On Grand Master, one careless decision can become a very short loading-screen appreciation session.
Can you reset skill points?
Yes. Skill points can be reset from the skill menu at a meditation point.
The first reset is free. Later resets cost one skill point, so it is worth testing new builds without feeling trapped by early choices. Stance selection and equipped perks can also be changed at meditation points.
You do not need to unlock every ability in both equipped stance trees. Purchase the moves you actually use, then invest remaining points in Survival, Force and Confusion skills. A fully completed stance tree looks pleasing, but aesthetic satisfaction does not increase Cal’s health bar.
Final verdict
The best overall Jedi: Survivor build uses Single and Double-Bladed stances with Resilience, Shatter and Fortification. It is flexible, easy to understand and effective throughout the story.
Players seeking a faster and more demanding style should switch to Dual Wield and Double-Bladed. Crossguard is the strongest choice for heavy damage, while Blaster provides the best ranged control. A Force build can dominate ordinary encounters but becomes more dependent on lightsaber fundamentals against resistant enemies and bosses.
The game is at its best when you adjust your setup rather than searching for one permanent answer. Keep a preferred stance, pair it with something that covers its weaknesses and change your perks whenever an encounter exposes a problem. Cal is rebuilding his relationship with the Force. He is apparently also rebuilding his perk loadout every twenty minutes.
Watch the Stance video guide:
Sources and further reading
Build details are based on the game’s final combat systems and perk effects. The official EA patch archive records the released updates, while the Jedi: Survivor stance guide collection provides further breakdowns of individual stance mechanics.