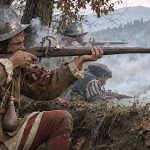
The Battle of Talavera, fought on 27–28 July 1809, ended with an Anglo-Spanish army holding its ground against repeated French attacks. It brought Sir Arthur Wellesley the title of Viscount Wellington, but it did not bring the allies much closer to Madrid.
That distinction matters. Talavera was a defensive victory bought with severe losses, followed by a retreat when French movements threatened the British army’s communications. The battlefield belonged to the allies. The campaign had become considerably less cooperative.
What interests me most about Talavera is how awkwardly it fits the familiar story of Wellington’s rise. There was impressive infantry discipline, certainly, but also surprise, confused orders, uneven leadership and soldiers fighting on almost empty stomachs. The polished reputation came later. The dust, hunger and uncertainty were there from the beginning.
Battle of Talavera at a Glance
| Detail | Summary |
|---|---|
| Dates | 27–28 July 1809 |
| Location | Near Talavera de la Reina, west of Madrid, Spain |
| War | Peninsular War |
| Allied commanders | Sir Arthur Wellesley and General Gregorio García de la Cuesta |
| French commander | King Joseph Bonaparte, advised by Marshal Jean-Baptiste Jourdan |
| Principal French formations | Victor’s I Corps, Sébastiani’s IV Corps and royal reserve troops |
| Result | Anglo-Spanish tactical victory, followed by an allied withdrawal during the wider campaign |
The French withdrew during the night of 28–29 July. Wellesley remained at Talavera for several days before moving west in response to the developing threat to his rear. He did not begin an immediate retreat to Portugal on 29 July. 28 July 1809
Background: The Advance into Spain
In May 1809, Wellesley crossed the Douro and drove Marshal Soult from Oporto. With the immediate danger to northern Portugal reduced, he turned towards Spain.
His proposed cooperation with Cuesta offered the possibility of defeating Marshal Victor and advancing towards Madrid. Another Spanish army, under General Venegas, was expected to help by threatening French positions from a different direction.
The difficulty was coordinating armies whose commanders had different priorities, unreliable information and strained supply arrangements. Wellesley could command his own troops. Persuading allied armies to move at the required moment was another occupation entirely.
The French also struggled to coordinate. Joseph Bonaparte had royal authority, Jourdan supplied military advice, and Victor pressed for action. Napoleon was elsewhere, fighting Austria, leaving his subordinates in Spain to reconcile orders, personalities and immediate threats.
By late July, French concentrations forced Wellesley and Cuesta onto the defensive near Talavera. Their opportunity to catch Victor in isolation had passed.
Forces
Strength figures vary because returns counted officers, non-commissioned officers, detached men and troops actually available for action differently. Rounded estimates are more useful than a suspiciously exact total.
| Army | Approximate strength | Composition |
|---|---|---|
| Wellesley’s army | Around 20,000–23,000 | British infantry and cavalry, King’s German Legion troops and artillery |
| Cuesta’s Spanish army | Around 33,000–35,000 | Line and light infantry, cavalry and artillery |
| Joseph’s French-led army | Around 45,000–46,000 | French infantry and cavalry, German and Dutch contingents, other allied troops and artillery |
The allies therefore had more men overall. However, the French directed their main attacks against Wellesley’s sector, creating a much less comfortable local balance.
Wellesley had approximately 30 guns. These were not the entire allied artillery establishment: Cuesta had separate batteries, including heavier pieces. French artillery numbered roughly 80 guns.
Leaders and Troop Composition
Anglo-Spanish commanders
- Sir Arthur Wellesley: Selected the British defensive position and managed reserves during the battle’s crises.
- General Gregorio García de la Cuesta: Commanded the Spanish army, which held Talavera and the allied right.
- Major-General Rowland Hill: Held the Cerro de Medellín, the crucial height on the British left.
- Lieutenant-General John Coape Sherbrooke: Commanded the division containing the Guards and substantial King’s German Legion infantry.
- Major-General John Randoll Mackenzie: Commanded the 3rd Division and was killed during the fighting.
- Brigadier-General Alexander Campbell: Commanded the 4th Division, whose troops helped defeat Leval’s attack.
- The Duke of Alburquerque and General Bassecourt: Provided Spanish cavalry and infantry support towards the threatened allied left.
Wellesley’s army included the 29th Foot, both battalions of the 48th Foot, Guards battalions and German infantry serving in the King’s German Legion. Mounted troops included the 23rd Light Dragoons and the 1st Light Dragoons of the King’s German Legion. Rifle-armed detachments of the 5th Battalion, 60th Foot, supported the infantry brigades.
French commanders
Joseph Bonaparte exercised overall command, with Jourdan as his chief military adviser.
- Marshal Victor: Commanded I Corps and strongly favoured attacking.
- General Horace Sébastiani: Commanded IV Corps.
- General François Ruffin: Led troops against the Cerro de Medellín.
- General Pierre Lapisse: Led a major attack and was mortally wounded.
- General Eugène-Casimir Villatte: Commanded another of Victor’s divisions.
- General Jean-François Leval: Led German and Dutch troops against the allied centre-right.
Calling this simply a French army conceals its multinational character. Soldiers from Baden, Hesse-Darmstadt and Holland fought alongside French formations, with further nationalities represented among the mounted troops.
The Battlefield: Why the Ground Mattered

The allied position extended northwards from Talavera towards the Cerro de Medellín.
Cuesta’s men occupied the town and its approaches, where walls, enclosed ground and olive groves complicated an attacker’s advance. Wellesley held the more exposed northern sector.
Three features shaped the fighting:
- The Cerro de Medellín: Its height strengthened the British left and made it an obvious French objective.
- The Portiña streambed: A useful terrain feature across the battlefield, although no continuous obstacle capable of stopping an army.
- The Pajar de Vergara redoubt: A fortified position near the junction of the allied armies.
Further north, the valley between the Medellín height and the Sierra de Segurilla created space for French attempts to turn the flank.
These were practical advantages rather than guarantees. A hill still needed defending, and apparently open cavalry ground could conceal a ditch. Talavera supplied a particularly expensive demonstration of the latter.
How the Battle Unfolded
Surprise at Casa de Salinas
On 27 July, French troops surprised British formations near Casa de Salinas, close to the Alberche.
The resulting withdrawal was confused and costly. Wellesley himself was briefly exposed to danger. This opening episode deserves attention because it interrupts the comforting image of a commander whose arrangements always worked.
Assistant-surgeon William Brookes described men expecting to settle into camp when retreating light troops suddenly appeared among them, followed by French fire. The main defensive battle began after an unwelcome reminder of how quickly an army could be caught unprepared.
The night attack
Victor attempted to seize the Cerro de Medellín on the evening of 27 July.
Darkness complicated the French advance, but the attack brought fighting dangerously close to the crest. Hill’s troops held the position.
Accounts differ over whether a later alarm represented a distinct second assault or confusion surrounding the first. It is better to preserve that uncertainty than arrange the night into a sequence tidier than the evidence allows.
The morning assault
French infantry attacked the height again on 28 July.
The defenders used the ground, controlled musketry and counterattacks to repel them. The 29th Foot played a prominent part in the fighting.
French artillery continued to inflict casualties even when the infantry attacks failed. Holding a strong position did not make standing on it pleasant.
The afternoon crisis
The wider French attack brought pressure against several parts of the allied line.
Leval’s troops were repulsed near Campbell’s sector and the redoubt. Elsewhere, a successful British advance carried troops too far forward, exposing them to renewed French pressure.
The 1st Battalion, 48th Foot, helped cover the reorganisation of Sherbrooke’s division. Mackenzie’s brigade also made an important contribution, one that received insufficient recognition in the original official account.
Talavera was saved through several overlapping actions. Giving the entire achievement to one battalion produces a fine regimental story and an incomplete history.
The cavalry charge

On the northern flank, Anson’s brigade advanced against French infantry formed to resist cavalry.
The 23rd Light Dragoons encountered a concealed ditch. Men and horses fell into it; others crossed and continued towards unbroken infantry under fire. The regiment suffered heavily.
The National Army Museum holds a guidon believed to have been carried by the regiment at Talavera. It is a tangible reminder of an action in which courage could not compensate for the ground and the enemy’s formation.
Arms and Armour

Talavera was primarily a battle of flintlock firearms and artillery. Swords remained essential cavalry weapons and common officers’ sidearms, but most infantrymen fought with muskets and bayonets.
The patterns below describe relevant period equipment. They should not be read as a surviving inventory of every weapon carried on the field.
| Weapon or equipment | Typical users | Characteristics |
|---|---|---|
| Brown Bess family of muskets | British and King’s German Legion infantry | Smoothbore flintlocks used for volleys, skirmishing and bayonet fighting |
| Baker rifle | Riflemen of the 5/60th | Rifled barrel offering greater accuracy, with slower loading than a smoothbore |
| French Model 1777 and corrected variants | French line and light infantry | Standard military flintlock muskets |
| British Pattern 1796 Light Cavalry Sabre | British light cavalry | Broad, curved blade designed principally for cutting |
| British Pattern 1796 Heavy Cavalry Sword | British heavy cavalry | Heavy, straight blade with a substantial protective guard |
| British Pattern 1796 Infantry Officer’s Sword | Many infantry officers | Straight, relatively light spadroon blade, usually with a brass shell guard |
| French An IX and An XI light cavalry sabres | French light cavalry | Curved blades with more enclosing guards than the British light cavalry pattern |
| Spanish Model 1796 cavalry swords and other service patterns | Spanish cavalry | Equipment varied between units and available stocks |
The 1796 infantry officer’s sword was straight-bladed, unlike the curved British light cavalry sabre. Officers also purchased non-regulation weapons, so an official pattern never tells the whole story.
How much armour was worn?
Most soldiers wore no body armour. Coats, leather equipment and headgear offered little protection against musket balls.
Nor should the French mounted arm automatically be illustrated as ranks of armoured cuirassiers. Dragoons, hussars, chasseurs and allied cavalry are central to Talavera’s mounted forces. The armour familiar from other Napoleonic battlefields should not be added merely because it looks impressive.
The Spanish Contribution
British retellings have often reduced Cuesta’s army to an account of troops panicking on the evening of 27 July.
Some Spanish units did break. That does not describe the conduct of an entire army.
Spanish troops held the allied right, secured the town and its approaches, served artillery and reinforced the threatened northern flank. Bassecourt’s infantry and Alburquerque’s cavalry helped obstruct French efforts to move around the British left.
The Spanish position also helps explain the unequal distribution of casualties. Much of Cuesta’s army occupied ground that the French chose not to attack heavily. Lower losses do not, by themselves, prove an absence of military value.
There is ample room to criticise Cuesta’s command without turning his soldiers into scenery.
Casualties and the Human Cost
| Army | Commonly cited losses | Qualification |
|---|---|---|
| Wellesley’s army | Approximately 5,363 | Killed, wounded and missing across the two days |
| Spanish army | Often estimated at around 1,000–1,200 | Returns and later estimates vary |
| French-led army | Approximately 7,268 | Killed, wounded and missing |
These are casualties, not deaths. Confusing the two greatly exaggerates the number killed.
British losses were especially severe relative to the size of Wellesley’s force. Heat, thirst, inadequate transport and the subsequent movements made caring for the wounded harder still.
Contemporary Quotes
Lord Burghersh on the 48th Foot
Writing to his father on 30 July 1809, Burghersh praised the battalion’s intervention:
“The steadiness of this regiment saved the day.”
His account captures the importance contemporaries attached to the 48th, although it needs reading alongside evidence for Mackenzie’s brigade and other formations.
Frederick Ponsonby on the cavalry charge
In a letter to Lady Duncannon dated 3 September 1809, Ponsonby described:
“charging five solid squares with a ditch in their front.”
His surrounding account is bitterly humorous about an experience that looked rather less glorious from the saddle. Both letters are discussed and referenced in the source commentary on the campaign.
Cuesta on Spanish conduct
In his dispatch of 28 July 1809, published in English translation, Cuesta wrote:
“our Troops have displayed great gallantry and steadiness”
He immediately acknowledged exceptions. Like Wellesley’s dispatch, this was a commander’s public account, with reputations and political consequences attached. It is evidence to examine, rather than a verdict to adopt whole.
Battle Timeline
| Date or phase | Event |
|---|---|
| May 1809 | Wellesley drives Soult from Oporto |
| July 1809 | British and Spanish armies cooperate in an advance towards Victor |
| 27 July, afternoon | French troops surprise British formations near Casa de Salinas |
| 27 July, evening and night | Fighting develops around the Cerro de Medellín; the French fail to secure the height |
| 28 July, morning | Renewed French attacks on the British left are repulsed |
| 28 July, afternoon | Major attacks strike the allied line; reserves help restore the British centre |
| 28 July, later fighting | Anson’s cavalry charge suffers heavily, particularly the 23rd Light Dragoons |
| Night of 28–29 July | French forces withdraw from the battlefield |
| 29 July | Craufurd’s Light Brigade arrives after the battle |
| Early August | Soult’s advance threatens British communications, forcing Wellesley to abandon further offensive plans |
The arrival of Craufurd’s brigade is an important detail: the 95th Rifles did not fight at Talavera as part of that brigade. Riflemen already present included detachments of the 5/60th.
Archaeology and the Battlefield Today
Talavera’s landscape helps explain the battle, but landscape study and excavated archaeological evidence are different things.
Historian and archaeologist Sergio de la Llave Muñoz has published work on the battle as a landscape of memory. His research provides a useful foundation for understanding its physical setting and commemoration. It does not justify presenting an undocumented list of recovered objects as established archaeological findings.
A systematic archaeological investigation could examine:
- Distributions of musket balls and artillery projectiles.
- Uniform fittings and equipment fragments.
- Surviving earthworks and historic boundaries.
- Burial evidence, where securely identified and professionally investigated.
Those are research possibilities, rather than confirmed discoveries described here. An isolated musket ball without a recorded findspot has limited power to explain a battle.
The battlefield also has a substantial modern monument, inaugurated in 1990, commemorating the participating armies. The landscape should therefore be understood as both a place of fighting and a place shaped by later remembrance.
Why Wellington Withdrew After Winning
The French army at Talavera had been repulsed, but it had not been destroyed.
Meanwhile, Soult’s forces approached the allied communications from the north. Wellesley initially underestimated the scale of that threat. Once its seriousness became clearer, remaining near Talavera risked cutting his army off from its support.
Supply shortages compounded the danger. The army was exhausted, transport was inadequate, and the expected cooperation between allied forces had not produced a workable route to Madrid.
Wellesley therefore moved west in early August and subsequently withdrew south of the Tagus. Wounded men who could not be evacuated remained behind.
This was the uncomfortable arithmetic of campaigning: an army could hold a battlefield and still be unable to stay there. historyofwar.org
Legacy: What Talavera Actually Proved
Talavera strengthened Wellesley’s reputation and brought his elevation as Baron Douro and Viscount Wellington. It demonstrated the resilience of his infantry and the value of a well-chosen defensive position.
It also exposed weaknesses that battlefield discipline could not solve: uncertain intelligence, inadequate supplies, difficult coalition arrangements and the danger of advancing while other French armies remained capable of intervention.
I find the battle more revealing when those failures remain visible. Wellington’s achievement was substantial, but Talavera was no effortless announcement of future greatness. His army survived several crises, inflicted serious losses and held its position. It then had to leave.
That is a considerable military achievement. It is also a reminder to read the campaign after the victory dispatch. 28 July 1809