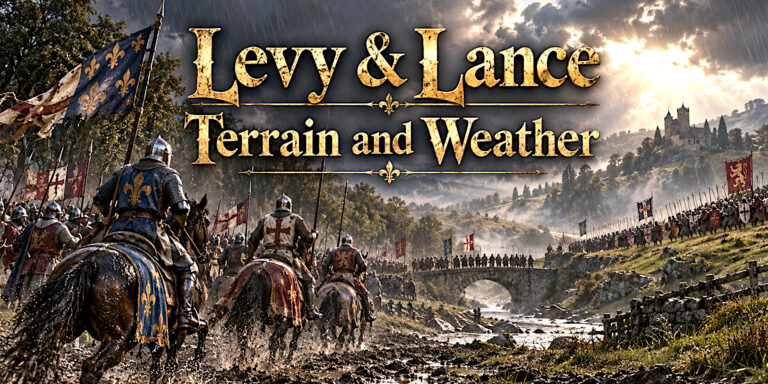
Levy & Lance makes raising a medieval army look wonderfully straightforward. Pick some troops, find a battlefield and give the orders. Then your cavalry gets stuck on unsuitable ground and somebody captures the commander you were quite attached to.
The appeal is learning how those decisions connect. A solid infantry position gives your missile troops time to work. A protected flank gives your cavalry room to manoeuvre. A sensible retreat can preserve a company you will need later.
This beginner’s guide covers army selection, deployment, turn order and the habits that give your first battle against the computer a better chance.
What Is Levy & Lance?
Levy & Lance: Medieval Europe is a free, turn-based browser wargame where you command a historically inspired army against the computer. No account is required.
The game covers three medieval periods across the years 500–1500, with a choice of battlefields and three modes. You muster a force, deploy its companies and fight through missile fire, movement and close combat. Free Historical Wargame
It is currently in beta. Treat this guide as advice for the present version, and check the in-game field manual when an update changes a rule.
The historical setting gives the units their character, but the rules make deliberate compromises for playability. Physicians, for example, represent care and recovery rather than an astonishing breakthrough in battlefield medicine.
Start With Field Battle
For a first attempt, I would choose Field battle, a modest army and relatively open ground. That gives you room to learn without turning every movement decision into a bridge-management crisis.
| Mode | How it works | Beginner advice |
|---|---|---|
| Field battle | Army break rules and objectives determine the outcome | Start here to learn positioning |
| Annihilation | Remove every enemy unit; a round limit can produce a draw | Try once you understand combat |
| Defender | Survive an endless assault, with fresh waves arriving | Save for a deliberate challenge |
In Field battle, losing half your starting strength breaks your army. If the battle reaches the selected round limit, objective control decides the winner, with equal control producing a draw.
Disordered troops cannot control objectives, and contested objectives count for neither side. Standing near the important ground is therefore only part of the job.
Defender is much harsher. Its opening enemy army is worth twice yours, and reinforcements arrive after every ten completed rounds. Clearing the current attackers does not end the battle.
Build an Army With a Clear Job for Every Unit
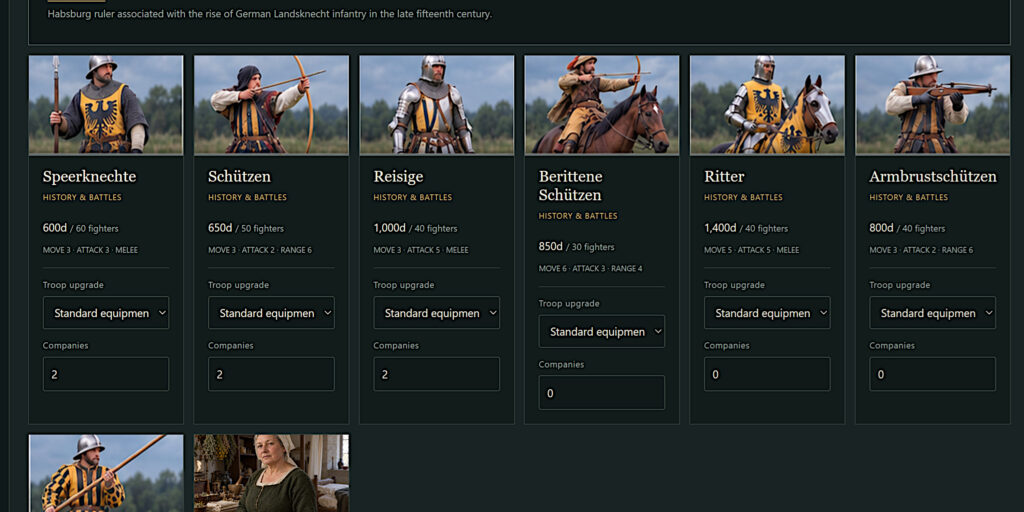
The army builder lets you choose your scenario, period, army tradition, warchest and other battle settings before deployment. You can select between two and twenty units.
Avoid spending the whole budget on whichever unit looks most likely to appear on the cover. Armoured cavalry has obvious appeal, but someone still needs to hold the centre.
A useful starting approach is:
- Infantry to hold ground and protect the rest of the army.
- Missile troops to weaken approaching enemies before contact.
- A mobile reserve, where your roster and budget allow, to answer threats or exploit a gap.
This is a suggested structure rather than a fixed winning roster. Available troops and battlefield conditions should shape the final choice.
Spears and pikes receive an extra combat die against mounted enemies. Bills gain a die against mounted or armoured opponents. Crossbows remove one armour save. Those differences give you reasons to choose a unit beyond its price.
Before buying an upgrade, ask what problem it solves. Better morale may help an exposed company stay in place, while an offensive improvement is wasted on troops that never reach a useful fight.
Deploy for the Battle You Want to Fight
Deployment is your first proper tactical decision. Give each company a route to its intended position and enough space to operate.
A straightforward arrangement puts infantry in the centre, missile troops where they can see approaching targets, and a reserve behind or beside the main line. Adjust that arrangement to the map rather than forcing it into every scenario.
Leave retreat routes open. Failed ordinary morale tests push troops backwards, and a blocked retreat costs strength. Packing every available square can turn a manageable setback into a small administrative catastrophe.
Protect both ends of your line. Flank and rear attacks bring combat and morale advantages, so an exposed edge deserves attention before the enemy reaches it.
During deployment, units can pivot freely when the required space is clear. Use that opportunity to sort out awkward formations before movement becomes contested.
Understand the Turn Order Before Committing
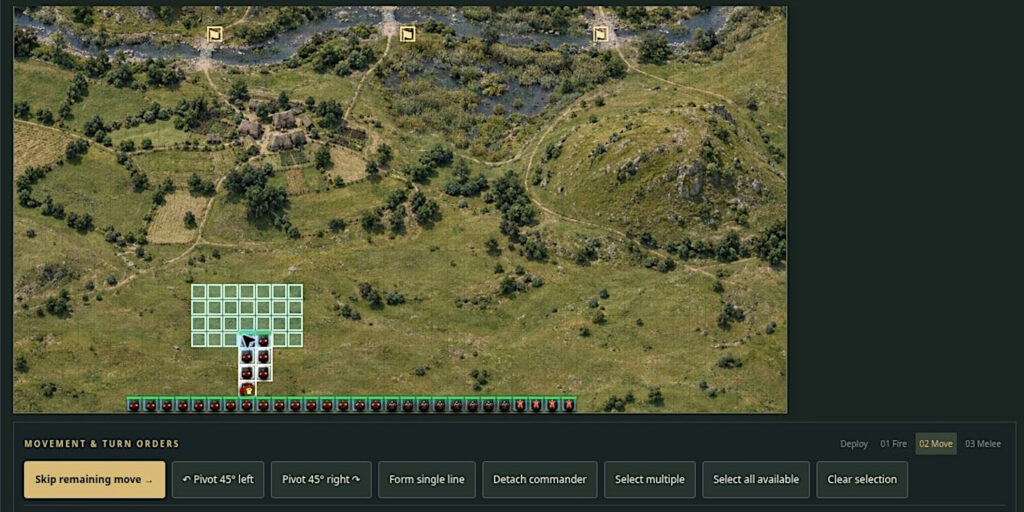
Each round follows this sequence:
| Phase | What happens | What to consider |
|---|---|---|
| Rally | Automatic attempts to recover from disorder | Which companies remain reliable? |
| Missile fire | Ranged units shoot | Which target threatens your plan? |
| Movement | Units reposition and approach contact | Where will the enemy respond? |
| Melee | Adjacent enemies fight | Which engagements are worth taking? |
You act first within each active phase, then the computer responds. Phases finish automatically when no legal actions remain, and impossible phases are skipped.
Use Skip remaining when you deliberately want to forgo actions. You do not need to press it after every unit has finished.
The crucial detail is that missile fire comes before movement. Archers moved into a better position will have to wait for the next firing phase to use it.
Also, defending in melee spends a unit’s melee action. Do not build a plan around every company being able to defend and then make another separate attack.
Let Terrain Shape Your Plan
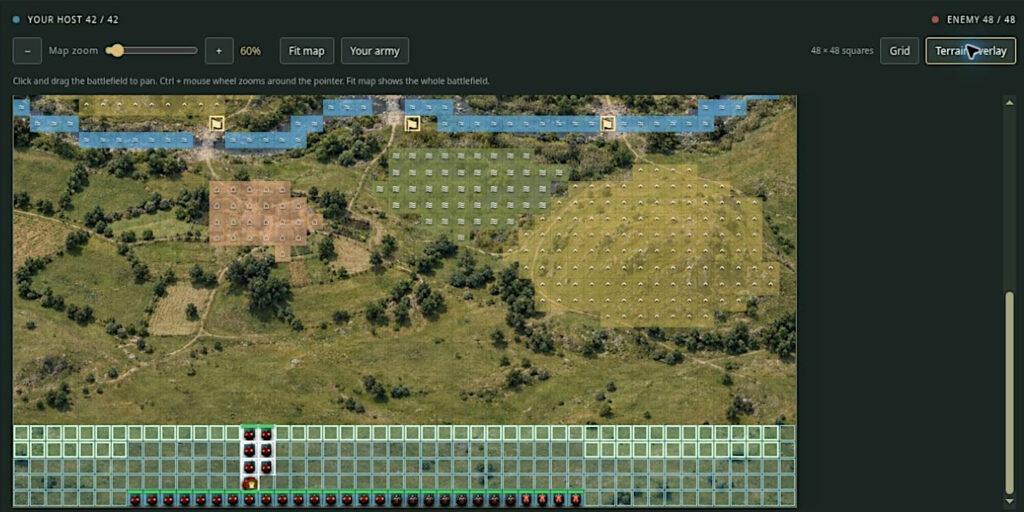
Before advancing, inspect the ground between your army and the enemy. Use the terrain overlay to clarify boundaries.
Hills and villages improve protection for foot troops. Woods and villages block sight. Deep river squares require a scenario-provided bridge to cross.
For cavalry, the surface matters especially. Ploughed earth and crops increase movement costs, while several rough or soft surfaces cancel mounted charge bonuses. Open ground that looks inviting at a glance may be less cooperative once inspected.
Weather adds another layer. Rain slows movement, particularly for mounted troops, and heavy rain increases the straight run needed for a charge. Wind penalises long-range shooting.
My preference for a first battle would be dry conditions and uncomplicated approaches. Learn what the army does on friendly ground before asking it to perform in a swamp.
Use Missile Troops to Prepare a Fight
Missile troops are useful for weakening an enemy before your infantry meets it, but a single volley will not erase a fresh company. The current rules cap a volley at two strength damage.
Closer shots are easier to land than shots beyond half range. That creates a choice between taking an early, less reliable shot and allowing the enemy nearer.
Concentrating fire on a dangerous target can be more useful than lightly damaging several companies. Prioritise enemies that threaten an objective, an exposed flank or your vulnerable troops.
Keep a route for your missile units to withdraw or receive support. They need protection once the distance closes.
One rule worth knowing: in Field battle and Annihilation, computer troops receive an armour advantage to compensate for limited tactical awareness. Similar-looking enemies may therefore withstand more punishment than you expect.
Charge When the Ground and Timing Suit You
A charge needs a straight run of at least three squares, increasing to four in heavy rain. Disordered troops cannot charge.
Before committing, check the approach, the surface and the destination. A successful move can still leave the charging unit isolated.
Cavalry is especially tempting to send forward early. I would keep it available until there is a worthwhile opening, rather than spend its mobility on the first reachable opponent.
Flank attacks gain an extra die and impose a morale penalty. Rear attacks gain a larger advantage. Creating that angle with coordinated movement can be worth more than another frontal collision.
The aim is to make the enemy respond to several connected threats. A lone heroic charge mostly gives the enemy a convenient meeting point.
Keep Your Commander Safe and Your Army Steady
Morale can decide whether a company holds, retreats or disappears from the battle.
An attached commander improves a unit’s morale. A separate commander can support nearby troops, but becomes vulnerable if left unprotected next to an enemy.
Commander capture damages morale across the army, with an additional risk to nearby troops that can see the captive. Protecting the commander is therefore a practical priority.
Disorder also reduces attacking effectiveness and prevents charges. A weakened company may need support and time to rally rather than another ambitious order.
Watch for a chain reaction: one retreat exposes a flank, the exposed company takes a worse fight, and suddenly the centre is considerably less central than intended.
A reserve gives you options when that starts happening.
Learn When to Use Lines and Blocks
Units begin in a single battle line. After fighting in melee during two different rounds, a line suffers an attack penalty from its third melee round onwards.
An unengaged unit can reform into a block up to three ranks deep, provided there is space. Blocks avoid that fatigue penalty.
Reforming during movement uses the unit’s movement action, so make the decision before you urgently need to be somewhere else.
A line can suit a broad frontage; a block offers an option for sustained fighting. Neither formation removes the need to protect the flanks.
Destroying or routing an enemy company rallies the victorious unit and resets its fatigue. Finishing a favourable engagement can therefore improve your position beyond removing the opponent.
A Simple Plan for Your First Battle
Choose Field battle and build a compact army whose roles you understand. During deployment, identify the objectives, a defensible position and a clear route for each company.
In the opening rounds, advance with support. Keep infantry close enough to protect missile troops, preserve room behind the line and avoid sending a fast unit so far ahead that help cannot reach it.
Once the enemy commits, focus on a manageable part of its army. Use shooting to prepare that engagement, hold elsewhere and look for a safe opportunity to turn a flank.
Before ending each movement phase, check three things:
- Can the enemy reach my commander or missile troops?
- Can my front-line companies retreat?
- Am I still playing towards the victory conditions?
That last check matters. Chasing a damaged enemy is satisfying, but an uncontested objective may be worth more.
Common Beginner Mistakes
Buying impressive troops without a supporting plan. Expensive units still need suitable ground, protection and a useful target.
Moving every company as far as possible. Maximum movement can leave gaps and expose flanks.
Forgetting that shooting happens first. Position missile troops for the following round.
Ignoring disorder. It affects fighting, charging and objective control.
Treating Defender like a battle you can clear. Its purpose is survival through continuing waves.
Staying in a tiring melee without considering formation. Check whether an unengaged company can reform before committing it.
A defeat becomes useful when you can identify the decision that made the next few turns harder. Change that decision in the next attempt, rather than replacing the entire army immediately.
Ready to Raise Your First Army?
For your first few games, aim for a force that stays connected and a plan you can explain in one sentence: hold the centre, weaken the approach and use the reserve when an opening appears.
There is plenty of room for more elaborate manoeuvres later. First, get the commander through a battle without becoming someone else’s prisoner.
Play Levy & Lance: Medieval Europe.