The Siege of San Sebastián in the summer of 1813 sit among the grimmest episodes of the Peninsular War. It was a hard military problem, badly solved twice, and paid for by soldiers and civilians alike. As a historian, one is tempted to admire the engineering effort while wincing at the human cost. This was modern siege warfare grinding against early nineteenth-century limits of logistics, discipline, and patience.
San Sebastián guarded the Bay of Biscay and the French line of retreat into southern France. For the Allied army under the Duke of Wellington, the town had to fall if the war in Spain was to be carried across the Pyrenees. For the French garrison, it was a stone cork in the bottle, holding back an enemy that was increasingly confident and increasingly ruthless.
Strategic background
By 1813, French control in Spain was collapsing. Victory at Vitoria had shattered Joseph Bonaparte’s field army, leaving isolated strongholds along the northern coast. San Sebastián was one of the strongest. Its medieval walls had been modernised with bastions and hornworks, and the position was strengthened by the tidal Urumea River and the steep Monte Urgull dominating the town.
Wellington understood that leaving such a fortress behind his advancing army was an invitation to disaster. Unfortunately, understanding the necessity did not make the assault any cleaner.
Forces
Allied forces
| Component | Details |
|---|---|
| Supreme commander | Arthur Wellesley |
| Siege commander | Thomas Graham |
| Estimated strength | 25,000 to 30,000 |
| Composition | British infantry, Portuguese infantry, artillery and engineers |
French forces
| Component | Details |
|---|---|
| Garrison commander | Louis Emmanuel Rey |
| Estimated strength | 3,000 to 3,500 |
| Composition | Line infantry, artillery, engineers |
The imbalance in numbers looks decisive on paper. In a siege, paper has a habit of lying.
Arms and armour
Napoleonic warfare sat at the crossroads between old habits and industrialised killing. At San Sebastián, steel, lead, and iron all had their say.
Allied equipment
- Infantry muskets, primarily the Brown Bess flintlock.
- Bayonets used extensively in the breaches.
- Artillery pieces ranging from 18-pounder siege guns to lighter field artillery.
- Swords carried by officers and some NCOs, including:
- British 1796 infantry officer’s spadroon.
- British 1796 light cavalry sabre, seen among attached cavalry and staff officers.
- Portuguese officer swords influenced by British patterns.
French equipment
- Charleville Model 1777 muskets.
- Heavy fortress artillery mounted on bastions.
- Grenades and defensive obstacles within the breaches.
- Officer swords including:
- French AN XI and AN IX sabres.
- Straight smallsword variants still favoured by senior officers.
In the breach itself, the sword was secondary. Muskets fired at point-blank range, bayonets did the rest, and gravity finished many who slipped on blood-slick rubble. It was not romantic, unless one has a very poor sense of romance.
The Siege timeline
| Date | Event |
|---|---|
| July 1813 | Allied army invests San Sebastián and begins formal siege works |
| 25 July | First major assault on the breaches fails with heavy casualties |
| Late July to August | Renewed bombardment reduces large sections of the town |
| 31 August | Final assault succeeds after brutal fighting at the main breach |
| Early September | French garrison withdraws to Monte Urgull |
| 8 September | Rey surrenders the remaining position |
The failed assault in July should have been a warning. It was instead treated as a rehearsal, with predictable consequences.
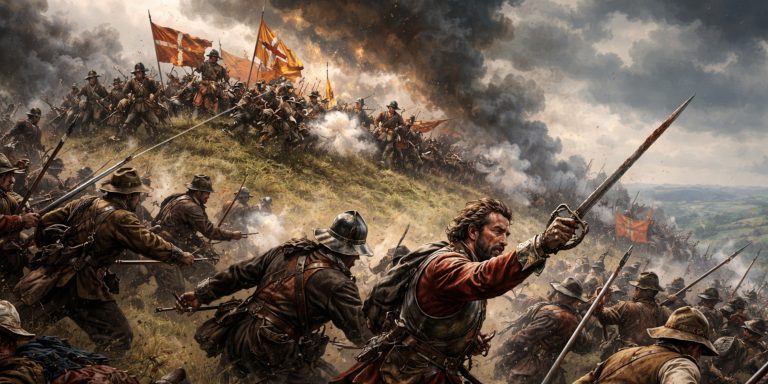
The storming and sack
The final assault on 31 August broke the French defence at appalling cost. Once inside, discipline collapsed. San Sebastián was looted, burned, and its civilian population subjected to violence that Wellington later struggled, not very convincingly, to explain away.
This was not an aberration unique to British troops. It was, rather uncomfortably, a feature of siege warfare when armies were exhausted, angry, and poorly restrained. Still, knowing that does little to soften the facts.
Archaeology and physical evidence
Modern archaeology in San Sebastián has uncovered traces of the siege beneath later rebuilding.
- Cannonball impacts and shot embedded in surviving wall sections.
- Burn layers corresponding to the fires of August and September 1813.
- Musket balls and uniform buttons recovered near breach sites.
- Structural damage patterns consistent with prolonged bombardment rather than a single catastrophic collapse.
The city rebuilt itself with remarkable speed, which is why so much of the evidence sits hidden below cellars and streets rather than on display.
Contemporary accounts
Captain Harry Smith, present at the assault, recorded the horror with a soldier’s blunt honesty, noting that the breach was “choked with the dying and the dead, over whom the living pressed forward.”
Wellington himself admitted in a letter that the sack was “a scene of plunder and violence such as I had hoped never to witness again,” which is a carefully phrased way of saying he had seen it before and disliked it every time.
A French officer later wrote that Rey’s defence was conducted “with honour, though abandoned by fortune,” a neat summary of a garrison that did its job and was overwhelmed anyway.
Historical assessment
San Sebastián was a necessary victory achieved in an unnecessary way. The fortress fell, the road into France opened, and the Peninsular War entered its final phase. Yet the price paid by the attacking troops and the civilian population stained the triumph.
From a military standpoint, it demonstrated the enduring difficulty of storming a prepared fortress even in the age of mass armies. From a human standpoint, it reminded everyone involved that victory and virtue rarely march in step.
Dry humour feels out of place here, but one cannot ignore the irony that a campaign fought in the name of liberation left one of Spain’s cities in ashes. History is very good at such contradictions.
Watch the documentary: